
Lucid has released a new group management experience. Accounts with SCIM enabled weren’t automatically migrated to the new experience as there are required steps to ensure continued functionality with your SCIM integration. The new organizational groups feature offers enhanced flexibility in user management by allowing license settings in Lucid to be configured and applied at the group level. For instance, you can automatically assign licenses to users within your engineering group, while requiring users in your sales team to request a license.
This post will walk you through the process of prepping your IdP side custom SCIM app and Lucid account to successfully migrate to the new organizational groups experience.
Reconfigure your Lucid SCIM integration
The prerequisite for this guide is to have a configured SCIM 2.0 application in your IdP that is being used for user/group provisioning to Lucid. You may have configured your SCIM application to assign or remove user licenses in Lucid. After enabling the organizational groups feature, user licensing will be managed solely through your organizational group settings in Lucid or manually via the Lucid Admin Panel > Users page.
If we receive a SCIM request that attempts to modify a Lucid user’s license values after organizational groups have been enabled, no changes will be made to the user in question’s license values in Lucid.
In this post, “group push” or “push groups” refer to groups you’ve created in your IdP/SCIM provider which you’ve used to create corresponding groups in Lucid via SCIM request. Please refer to our SCIM API documentation here for an example.
Enable SCIM organizational groups in Lucid
For this stage of the migration, you will need account owner or account admin access to Lucid. If you aren’t assigned one of those admin roles, reach out to the admin for your Lucid account to be assigned one of these roles before proceeding with the following steps.
- Log in to Lucid.
- Select Admin from the left-hand menu.
- Click App integration from the left-hand navigation menu.
- From the dropdown menu, click General.
- Locate the SCIM tile and click Settings.
- You will be prompted by the instructions at the top of the page to enable SCIM for organizational groups.
- Under action item 1, click Enable SCIM for org group.
- Then return to this page and continue with the reconfiguration of your Lucid app. When you are finished, you will return and complete action item 2 by clicking Lucid app reconfigured.
- If your organization uses an “All Users” group for app assignment to Lucid (will most likely have a customized name for your company but is typically used to assign all users at your company access to a given application), scroll down to the “Exclude a group from your identity provider” section of the SCIM page and click Specify a group in the top-right corner.
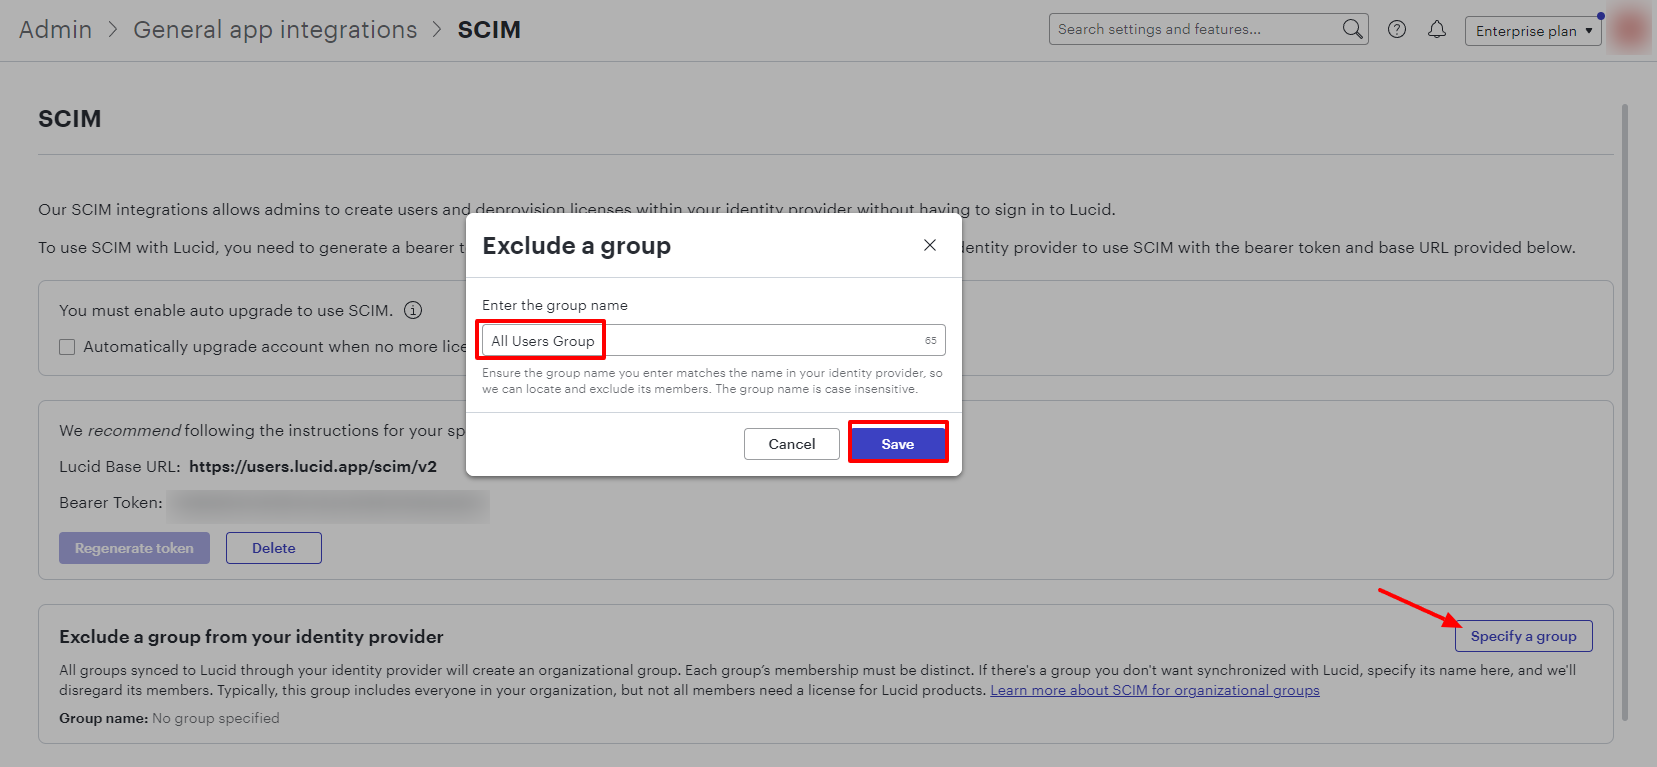
- In the textbox for a group name in the pop-up window, type in the exact name of the IdP group being used as your “All Users” group.
- The name specified here must match the exact name used in your IdP.
- Click Save.
Remove license schema/attributes (optional) and push groups to Lucid
As referenced in the “Reconfigure your Lucid SCIM integration” section above, after enabling organizational groups, modifications to license values sent via SCIM request to update a user’s assigned licenses in Lucid will no longer be applied. If you have been using SCIM to send license values, after enabling organizational groups in the Lucid Admin Panel you can optionally remove the product license schema for Lucid in your IdP/SCIM app.
If you have existing groups in Lucid that you’ve created via SCIM, you will need to re-push these groups to Lucid via SCIM in order to create them as organizational groups in Lucid. The steps for sending the group creation request via SCIM will be dependent on your IdP/custom SCIM app for Lucid.
- We recommend customizing the following groups in your IdP:
- (If applicable) An “All Users” group: This should be the group to which all current and new users at your company are automatically added. It allows all assigned users to sign into the Lucid application (if SAML has been configured) and is used to provision all users in this IdP group into your default Lucid organizational group.
- There is no limit on the number of users you can have in this group within Lucid because they are provisioned as limited-access users by default. Users can have membership in this group until they leave the company.
- We recommend customizing licensing groups.
- These groups will be used to assign a user a license in Lucid based on their membership to the group.
- Removing users from a licensing group will delicense them to free up licenses for others to use.
Note: You can have as many license user groups as you want, but because a user can only belong to one organizational group, each user can also only belong to one push group at a time across all groups. The only exception to this rule is if your organization uses an “All Users” group for app assignment to Lucid, which all users belong to alongside their license group. This group (which will most likely have a customized name for your company) is typically used to assign all users at your company access to a given application.
View your IdP groups as organizational groups in Lucid
After you’ve pushed your groups via SCIM, check that you are seeing the expected groups from your IdP created as organizational groups in Lucid, which will confirm that the migration was successful. To access the organizational groups page in Lucid, follow these steps:
- Navigate back to the Lucid admin panel.
- Select Groups from the left-hand navigation menu.
- From the dropdown menu, click Organizational groups.
You should now see your IdP groups rendering as organizational groups on this page of the Lucid admin panel.

Note: If you successfully followed the steps to exclude the All Users group in your IdP from organizational groups, you won't see that group in the Lucid admin panel. Any users that aren’t added to one of the organizational groups you created to license users will instead be added to the “Default organizational group” automatically.
Configure license settings for each group
You’re now ready to configure the license settings for each of your organizational groups. This will ensure that users are licensed or delicensed appropriately when they are added to or removed from one of the license groups.
To access license settings, follow these steps:
- Navigate to the Lucid admin panel.
- Select License settings from the left-hand navigation menu.
- From the dropdown menu, click Lucid Suite settings.
- Proceed to the appropriate set of steps below to customize license settings for each organizational group.
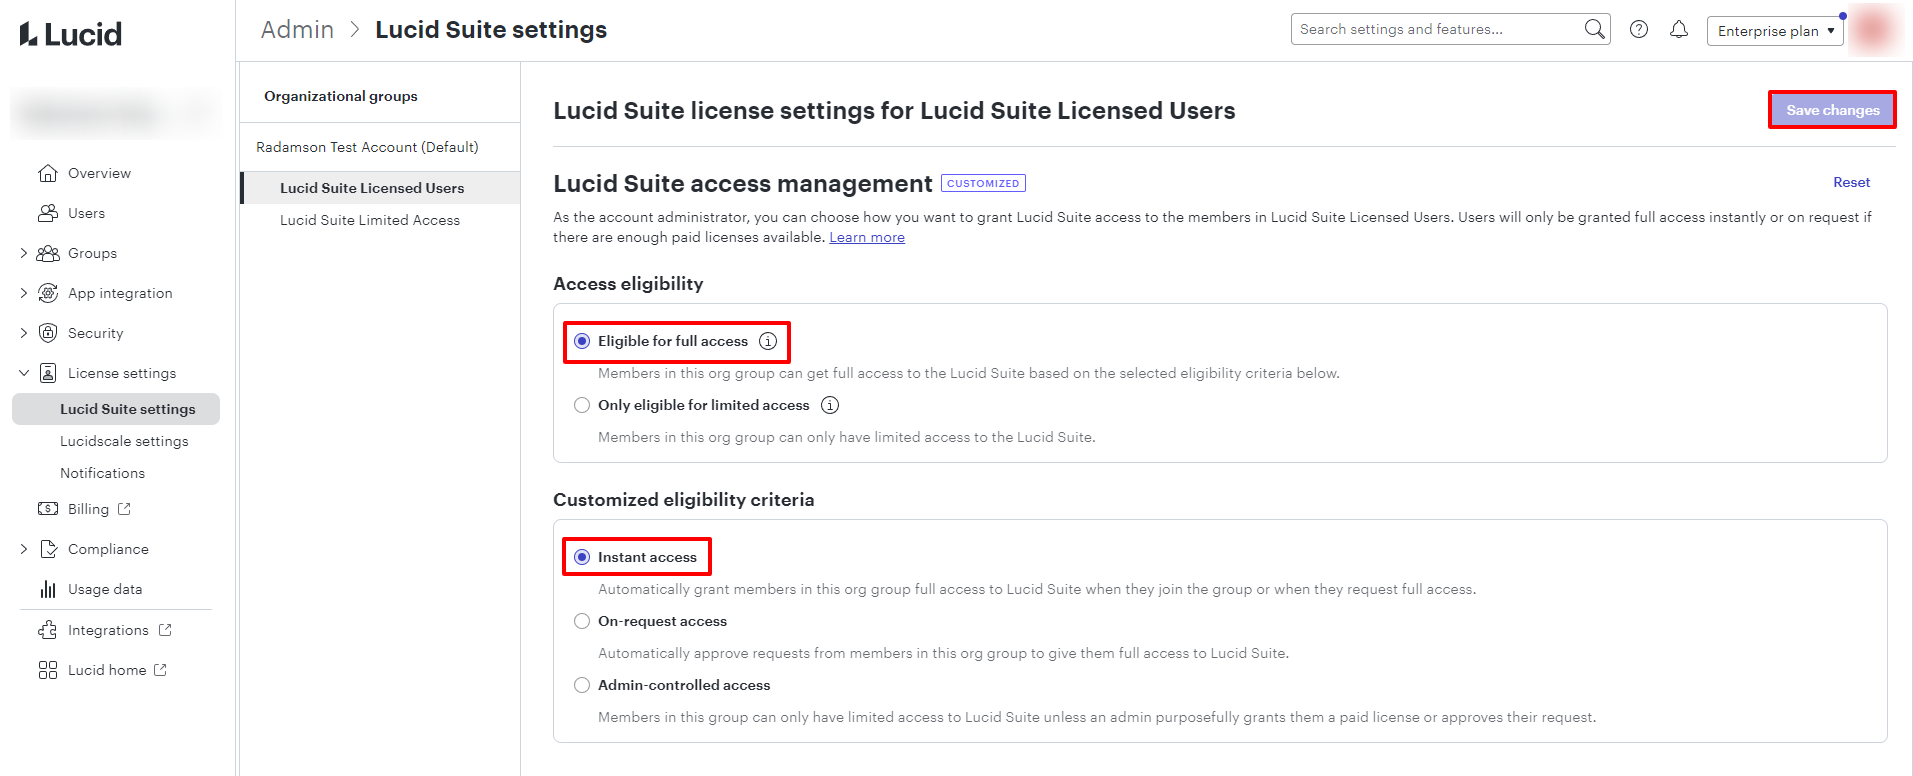
Configure license setting for licensed users group:
- Click Lucid Suite Licensed Users from the list of organizational groups on the left-hand side of the licensing page.
- Under the “Access eligibility” section, select Eligible for full access.
- Under “Customized eligibility criteria”, select Instant access.
- Click Save changes.
Note: These settings will make it so any users added to this group via SCIM will automatically receive a Lucid Suite license.
You have now completed all the steps to reconfigure the Lucid app. License settings should now be managed via the organizational groups created via SCIM.
Tip: You will now return to the SCIM integration page in Lucid to complete the second action item (as outlined in step 6 of the Enable SCIM organizational groups in Lucid section above) to finalize enabling the organizational groups experience.
Deactivate or delete users
In some cases, rather than using the removing users from the licensing organizational groups you’ve set up, you may want to fully deactivate users via SCIM. This will ensure that these users can no longer sign into Lucid under this account, even as limited-access users. A deactivation via SCIM will additionally trigger a de-license automatically.
When deactivating user, you must transfer their documents to another user on your Enterprise account. By default, the account owner will be the recipient of the documents that are automatically transferred upon delicensing or deleting a user. You can change the recipient of the transferred documents by navigating to the SCIM integration settings in the Lucid admin panel and selecting Modify default owner to the right-hand side of the email address. See the screenshot below for reference.
Clicking Modify default owner redirects you to the “Compliance settings” page of the admin panel where you can change who the default document owner on your account is. Refer to Lucid admin panel: Compliance settings article for additional details.
