
Most of my object are "containers" for other content and as such the text cannot be centered vertically and horizontally in the shape.


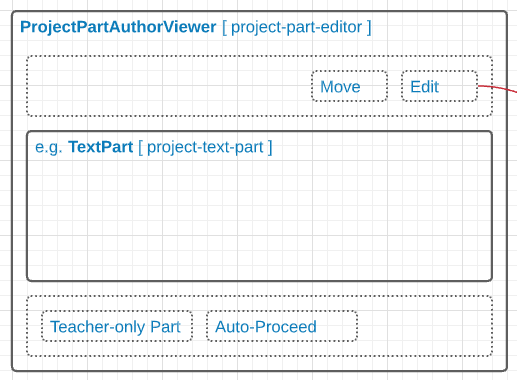
I've created a number of containers with text elements where I need them. These are grouped and added to my library. However when I resize them the grouping rules resize the text element as well which breaks the shape. e.g.;


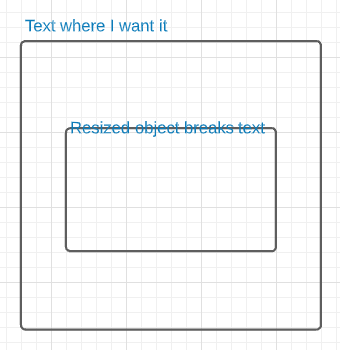
How do I prevent this? I'd assume I'd somehow mark the text parts as "lock vertical size" or "lock horizontal size" (depending on orientation of the text) and then set the shape's 00 origin to the part I want the resizing rules to work from i.e. the top-left corner of the box. That's the basic shape design approach I remember in Visio.

Hi Michael thanks for posting in the community. I'm sorry for the trouble you are having with containers and text and am happy to help!

If your textbox and containers are grouped together you can resize it without changing or resizing the text element by double clicking and entering the editing mode of the group. After making the desired changes double click anywhere on the canvas or ESC to return to the usual editor. Please take a look at the attached GIF to see this in action. 


Please let me know if you have any questions. Hope this helps! 


Thanks Leianne that's very helpful and for this simple frame it works.
But from a UX standpoint the way grouping works slows things down a lot.


I should be able to-


  1. Double-click my text


  2. Type to replace it

  3. Hit enter to save it


However with the grouped object that changes to-


  1. Double-click to edit the group


  2. Double-click my text


  3. Type to replace it

  4. Hit enter to save it

  5. Hit esc to exit the group editor


The same with sizing the overall box I should be able to just click and drag the size to what I need but with grouping I have to enter and exit group-editing mode in order to accomplish that.


I've found a different approach that's nearer to what I'm looking for which is to use the in-built text part of the shape. and position it.


In this example I've set the text position to top-left;


And adjusted the Left Indent and Before settings to 0.1;


However LucidChart only allows positive values in the Before setting so using this approach I am only able to position the text inside of the shape;


Could you please put in a request to allow negative values as well?


If I could specify a Before setting of e.g. -1.0 cm that would position the text just above the box perfectly.


The same goes for the other values so that text can appear above below left or right of the shape.


Hi Michael thanks for following up and providing detailed examples. I understand how your new approach is not quite what you are hoping to achieve and the steps for editing groups can slow things down for your usecase (that said the custom container in your example looks great!).

We are always looking for ways to improve and love to hear about how everyone is using Lucidchart. Would you mind adding your ideas to our product feedback space? Ideas discussed in this space are passed on to the product development team for their consideration.

Please feel free let me know if you have any questions! 


Reply