I am struggling to find a way to anchor a point on my drawing as a 0' x 0' co-ordinate for my wall sections and background grid to match on. In Visio I would set a point and all my grids (X and Y rulers and snap lines) would use that as the 0' x 0' point. I could then use that as the corner of my floor plan and all snap lines and rulers would use that as the "0" reference point. I have tried using the "scale" as well as the page layout and the measurement tools but have not found a way to "lock" them all together based on a common reference point on the diagram and common scale.
any help would be greatly appreciated.

Best answer by alison cheney
Hi @Hans,
Thank you for posting in this thread in the Lucid Community!
You can set the guides to an exact location by entering a value once they have been placed by following these steps below:
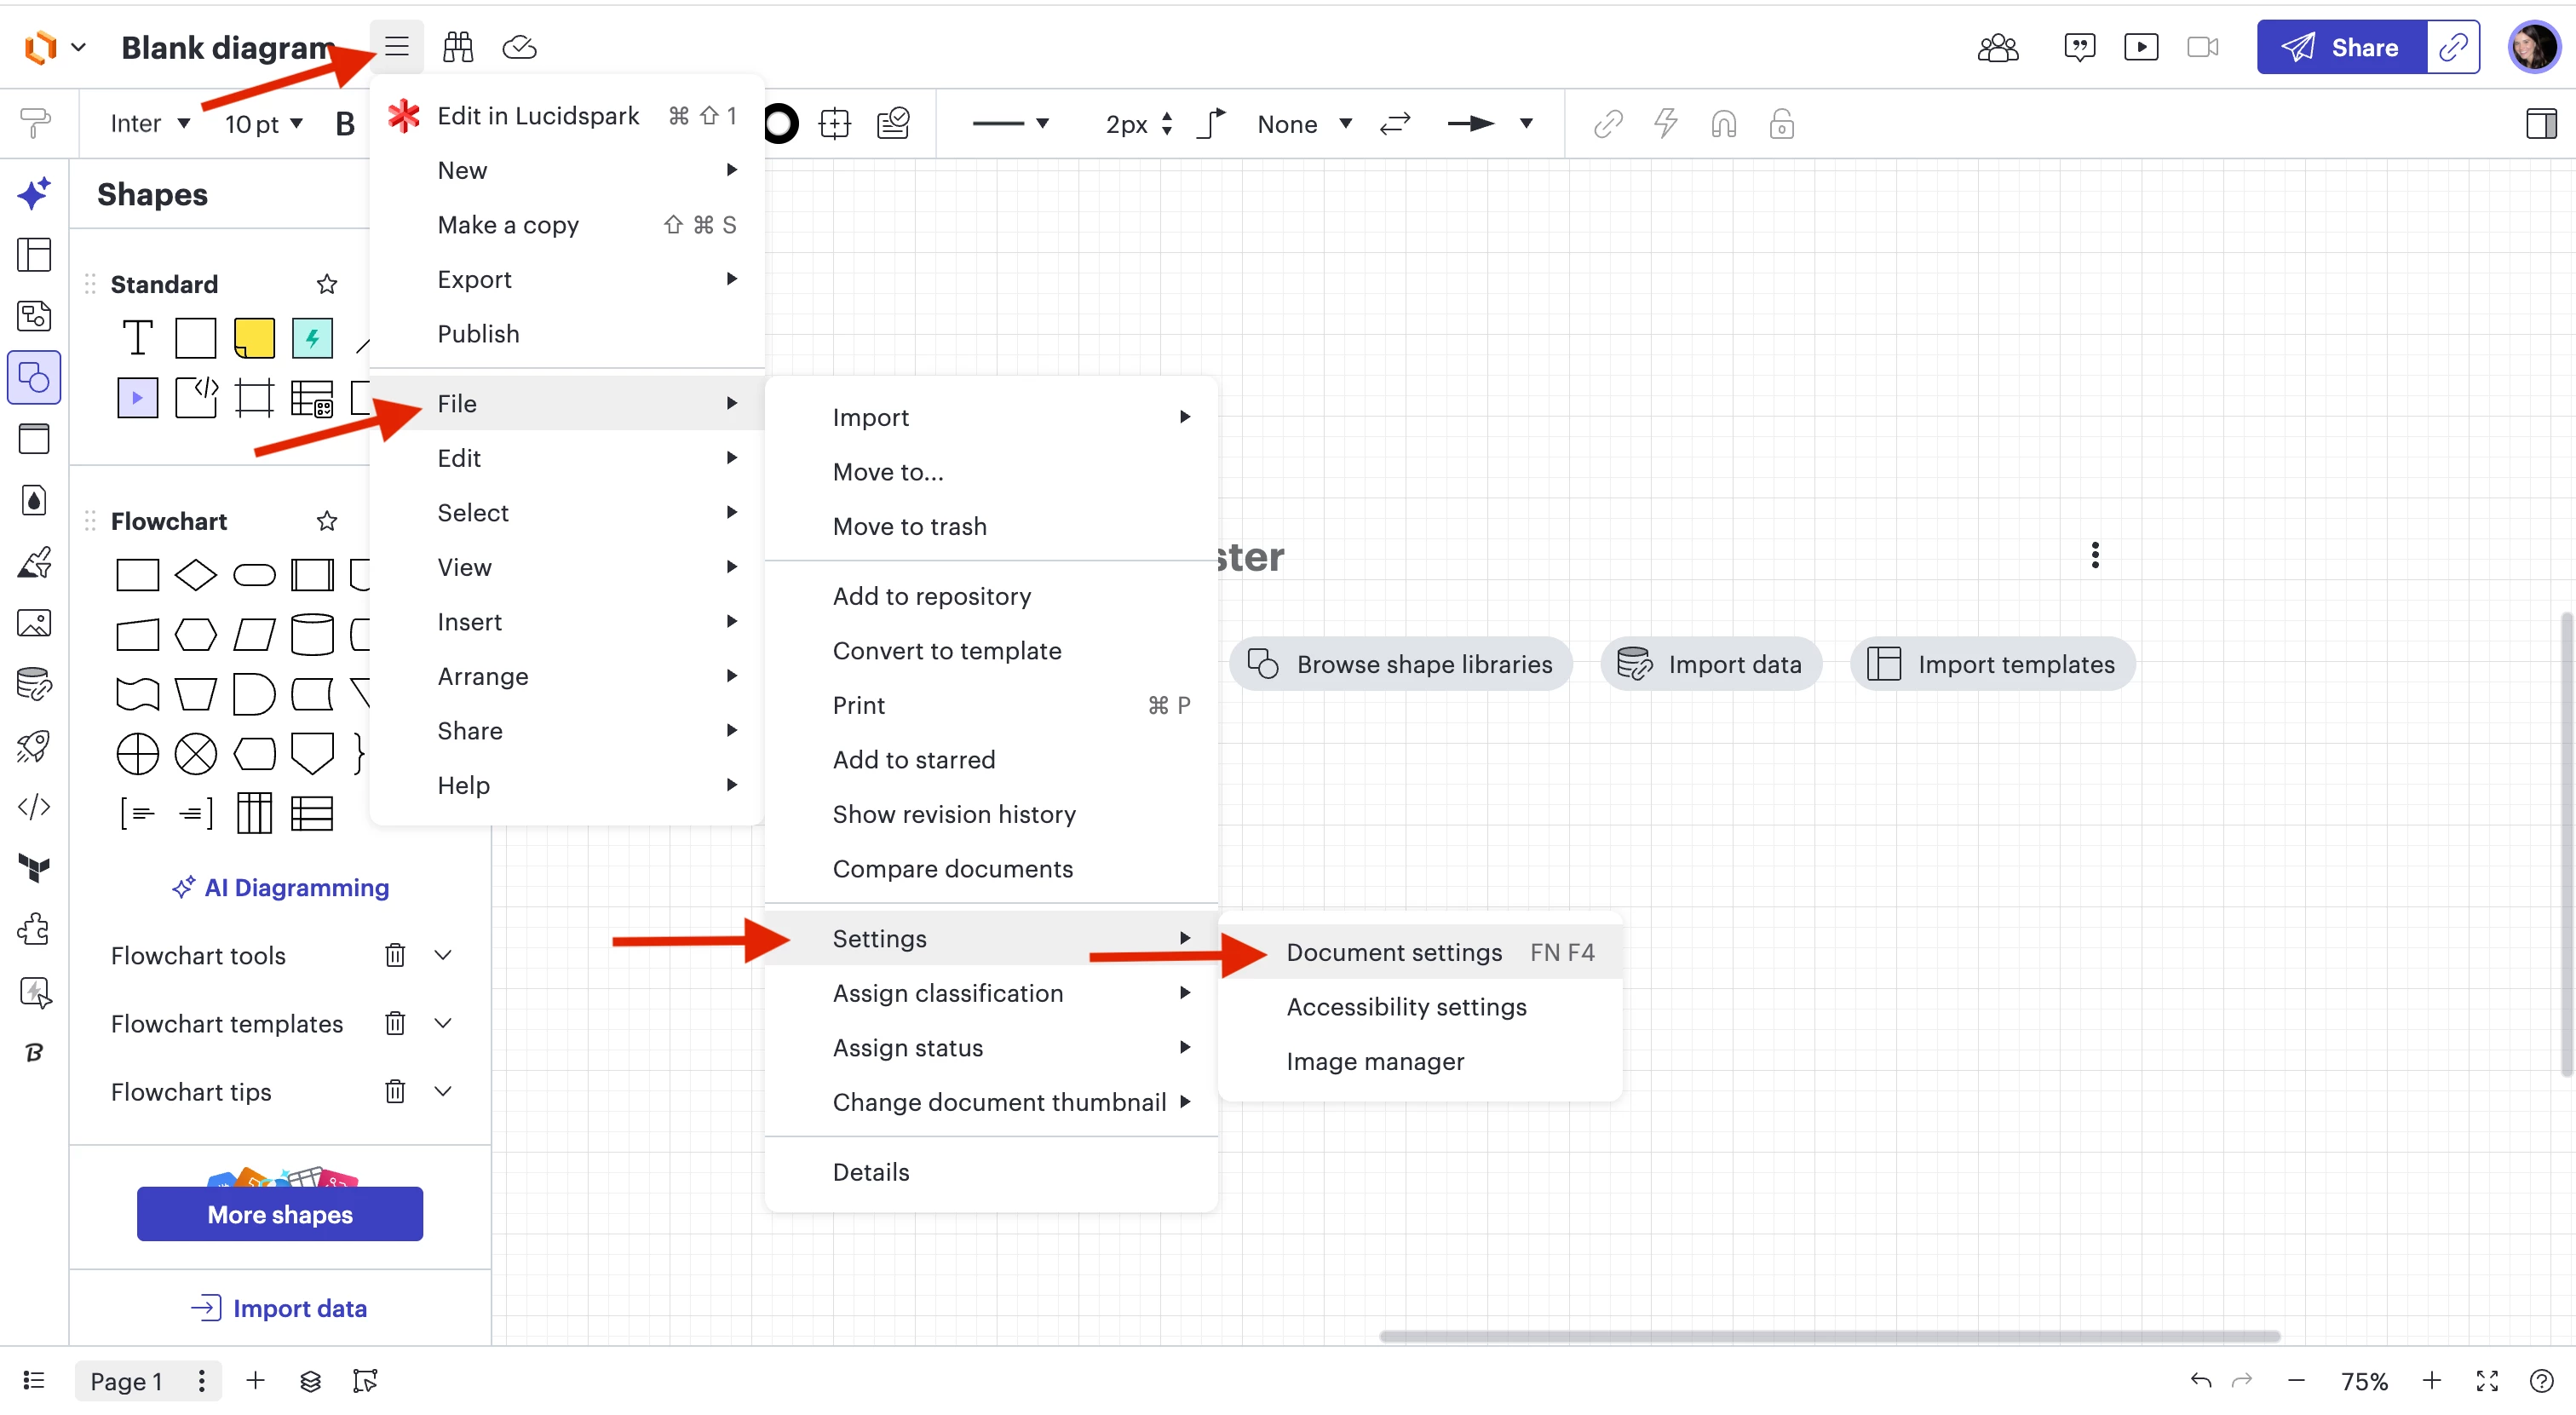
On your Lucidchart document, select the More menu from the top-left of your canvas. Hover your cursor over “File”. Hover your cursor over "Settings". Click Document settings (see screenshot below showing these steps).
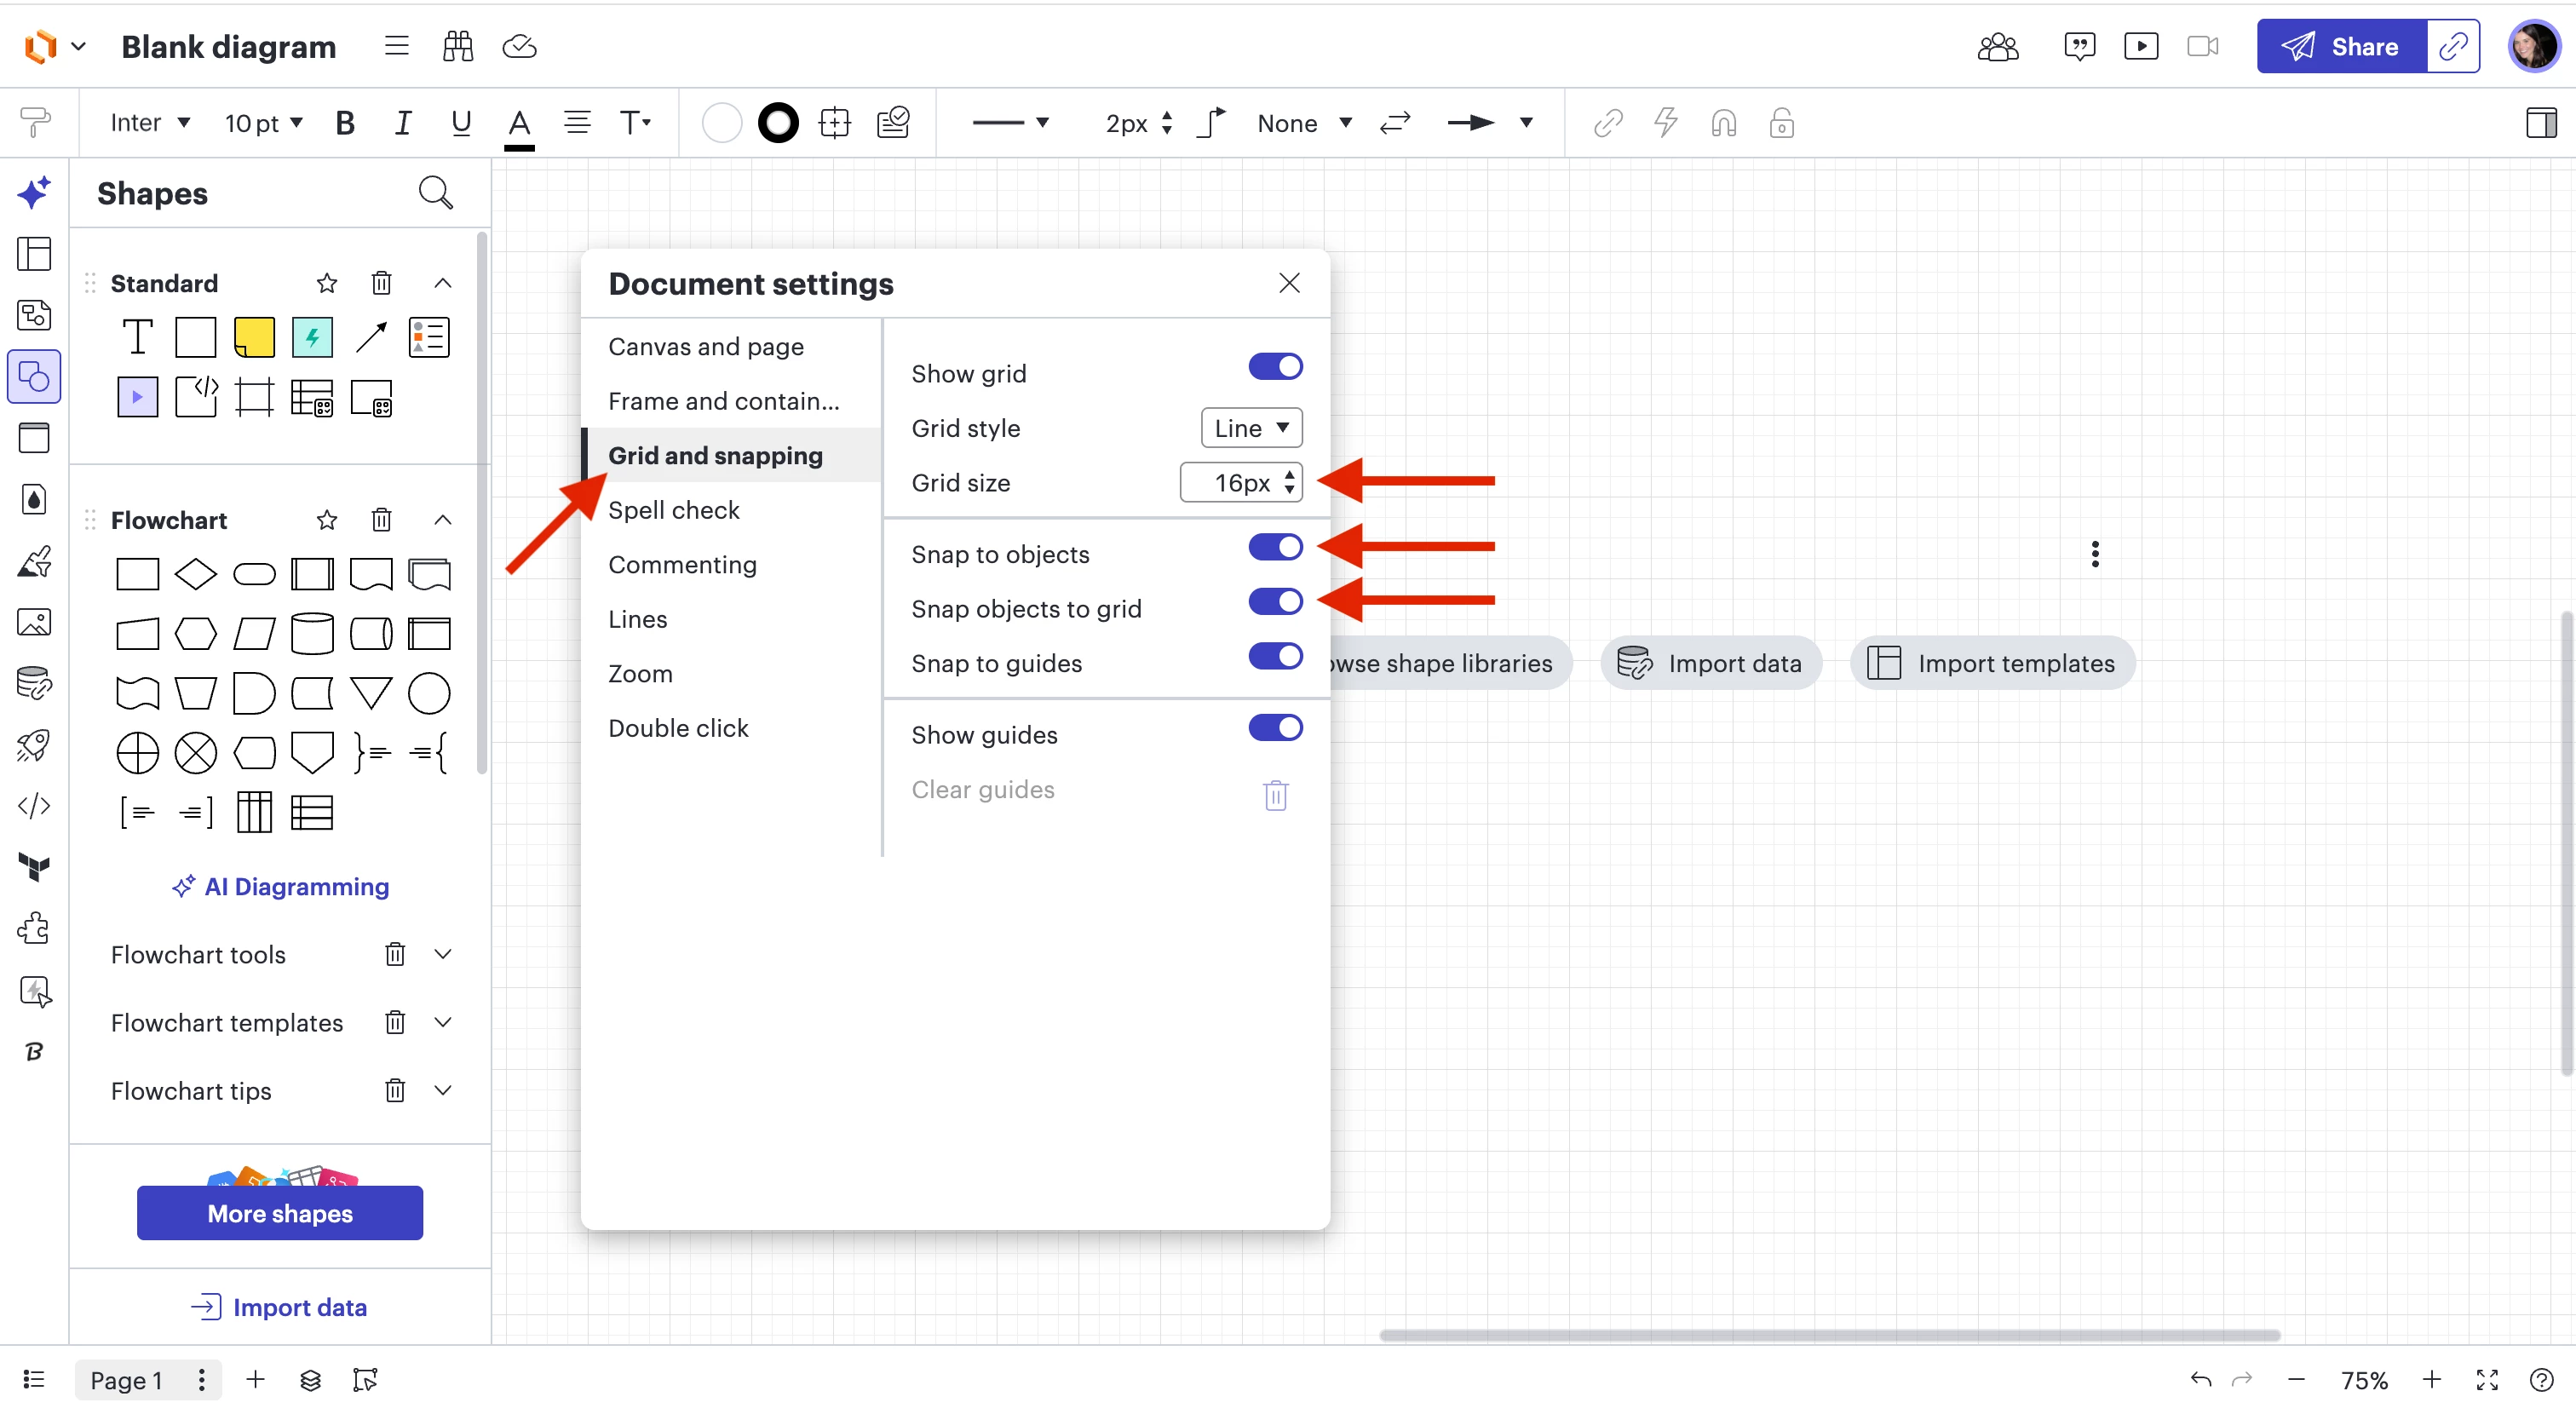
In your Document settings, click Grid and snapping (see screenshot below) and make adjustments below depending on the needs/current state of your document.
Adjust grid size: Use the dropdown to the right of “Grid size” to adjust the distance between grid lines.
Snap to objects: Toggle on “Snap to objects” to force objects to align with other objects on the workspace.
Snap objects to grid: Toggle on “Snap to grid” to force objects to align with your document’s grid.
Snap to guides: Toggle on “Snap to guides” to force objects to align with guide lines.
Show guides: Toggle on “Show guides” to view guides as lines on the workspace.
Clear guides: Click the trash can icon next to “Clear guides” to remove all guides from your document.
Thanks for your post. I recommend using Guides as a way to standardize the layout of your floor plan. You can insert a Guide by right-clicking on the canvas and selecting "Create Horizontal Guide" or "Create Vertical Guide." Then you can move these around your diagram and create your floor plan around the Guides.
Thank you for posting in this thread in the Lucid Community!
You can set the guides to an exact location by entering a value once they have been placed by following these steps below:
On your Lucidchart document, select the More menu from the top-left of your canvas. Hover your cursor over “File”. Hover your cursor over "Settings". Click Document settings (see screenshot below showing these steps).
In your Document settings, click Grid and snapping (see screenshot below) and make adjustments below depending on the needs/current state of your document.
Adjust grid size: Use the dropdown to the right of “Grid size” to adjust the distance between grid lines.
Snap to objects: Toggle on “Snap to objects” to force objects to align with other objects on the workspace.
Snap objects to grid: Toggle on “Snap to grid” to force objects to align with your document’s grid.
Snap to guides: Toggle on “Snap to guides” to force objects to align with guide lines.
Show guides: Toggle on “Show guides” to view guides as lines on the workspace.
Clear guides: Click the trash can icon next to “Clear guides” to remove all guides from your document.
A Lucid or airfocus account is required to interact with the Community, and your participation is subject to the
Supplemental Lucid Community Terms.
You may not participate in the Community if you are under 18. You will be redirected to the Lucid or airfocus app to log in.
A Lucid or airfocus account is required to interact with the Community, and your participation is subject to the
Supplemental Lucid Community Terms.
You may not participate in the Community if you are under 18. You will be redirected to the Lucid or airfocus app to log in.