
You have the option to configure additional field mappings in SCIM, including the following:
- Title and department: These can help you make decisions on if users should get a license as well as sort users into the correct groups.
- Cost center: This is particularly valuable if you’re looking to use internal bill-back. With the cost center number populated, you can export a user’s CSV and see which licensed users map back to which cost centers.
- Organization and division: These provide additional options to add user information that may be valuable for your use.
To include any or all of these additional fields in your SCIM push from Okta to Lucid, follow these steps:
- Log in to Okta.
- Navigate to the Provisioning tab.
- If “To App” is not already selected, select it.
- Scroll down on the page and click Go to Profile Editor.
- Click + Add Attribute and enter the attribute information for the attribute of your choice.
Data Type
Display NameVariable Name External Name External Namespace string lucid_title title title urn:ietf:params:scim:schemas:core:2.0:User string lucid_department department department urn:ietf:params:scim:schemas:extension:enterprise:2.0:User string lucid_division division division urn:ietf:params:scim:schemas:extension:enterprise:2.0:User string lucid_costcenter costCenter costCenter urn:ietf:params:scim:schemas:extension:enterprise:2.0:User string lucid_organization organization organization urn:ietf:params:scim:schemas:extension:enterprise:2.0:User - Optionally, click Save and Add Another, then enter the information for another attribute. Repeat for as many attributes as you want to add.
- Click Save.
- Navigate back to your Lucid application in Okta, and select Provisioning.
- Scroll down on the page and locate the new attributes you created in steps 5-6.
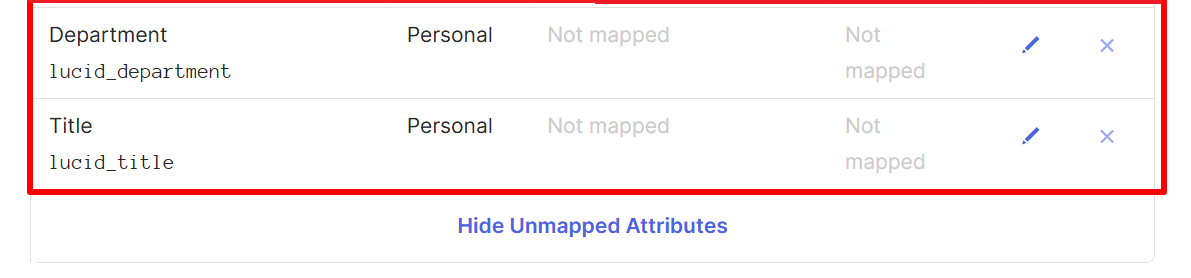
- You may need to unhide hidden attributes by clicking the Unhide Unmapped attributes button underneath the attributes.
- Click the pencil icon to the far-right of one of the attributes.
- Click the drop-down menu and select Map from Okta Profile.
- In the second drop-down menu that appears, search for the particular attribute you selected.
- For the title attribute, search “title” and select title | string.
- For the department attribute, search “department” and select department | string.
- For the organization attribute, search “organization” and select organization | string.
- For the division attribute, search “division” and select division | string.
- For the cost center attribute, search “costCenter” and select costCenter | string.
- Then select Create and Update.
- Click Save.
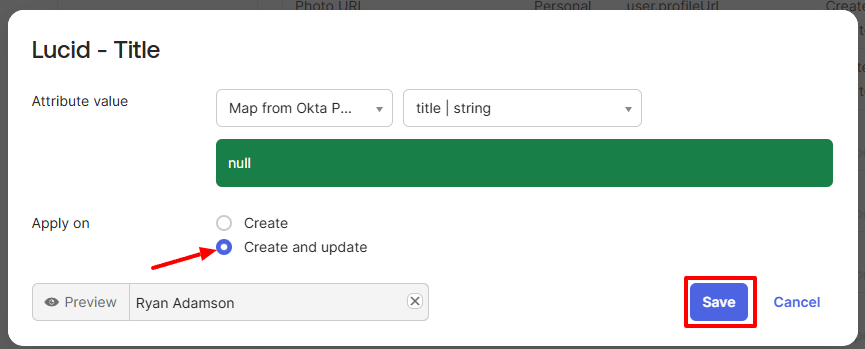
- Here is an example of what this process looks like for the title attribute.
- Repeat steps 9-13 until you have completed the steps for all attributes.
- If done correctly, your attributes should look similar to these examples:

These fields will now populate for this user within Lucid as long as there are values in the fields within Okta.