Integrate your Lucid Enterprise account with Google to enable your users to authenticate using SAML single sign-on (SSO) through your identity provider (IDP).
The purpose of this post is to provide instructions on how to configure Google using SAML to work with Lucid. This is not an officially supported IdP, so you may notice that the instructions or screenshots in may become outdated over time.
Before proceeding with the steps in this guide, please refer to the Lucid SAML authentication instructions provided in the Configuring SAML with unofficially Supported IdPs post.
To configure Google to work with Lucid, follow these steps:
- Navigate to the Google Admin Console.
- Click Apps.
- Select Web and Mobile apps.
- Click Add Apps.
- From the dropdown select Search for apps.
- Search for Lucid.
- Click Select next to the Lucidchart icon.
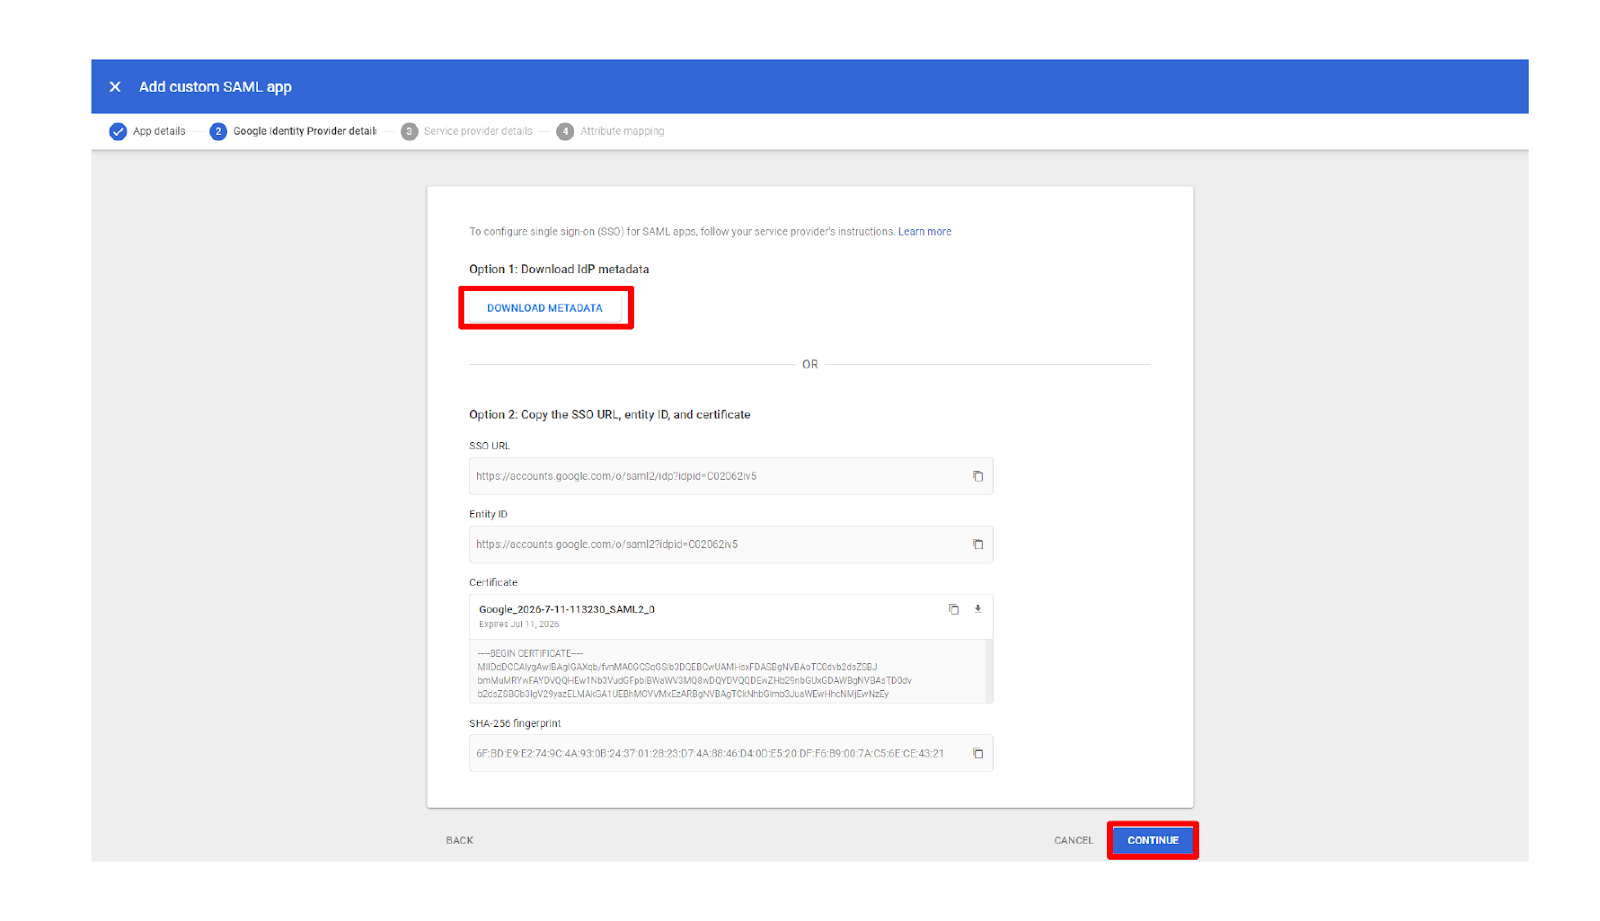
- Click DOWNLOAD METADATA to download the metadata file.
- Click CONTINUE.
- In the ACS URL section add your ACS URL, this is structured like:
- https://www.lucidchart.com/saml/sso/YOURDOMAIN
- In the Entity ID section type ”lucidchart.com”.
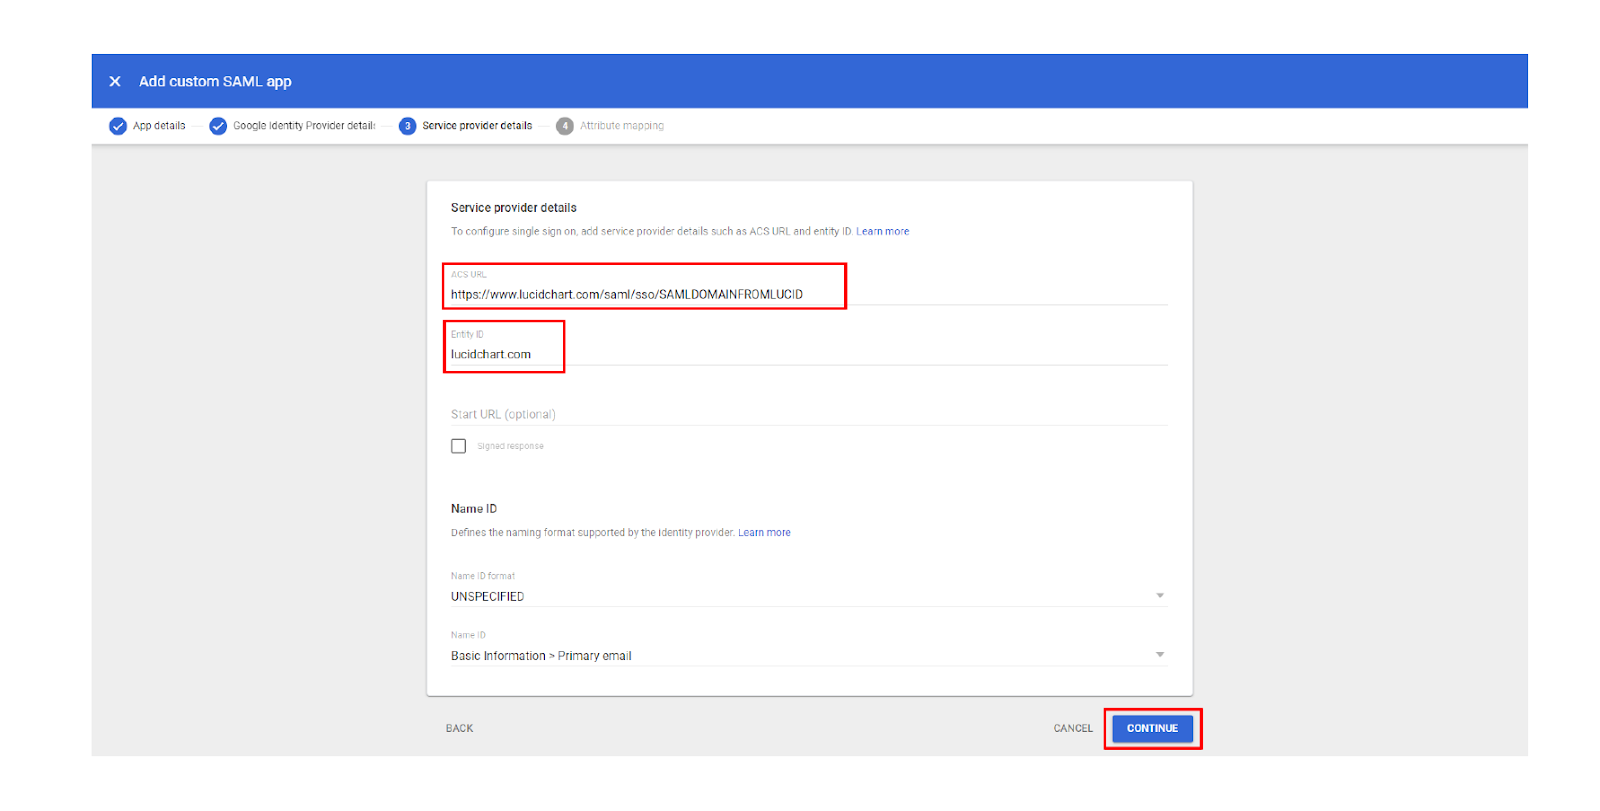
- Click CONTINUE.
- Click FINISH.
- Click the dropdown arrow next to User Access.
- Select ON for everyone.
- Click SAVE.
Return to Lucid:
- Navigate to the Admin Panel.
- Click App integration.
- Select SAML.
- Click Settings.
- Click + Add identity provider.
- Upload the downloaded XML metadata file from step #8 of the section above.
If you would like to see more detailed instructions, reference step #7 of Configuring SAML with unofficially Supported IdPs.
Testing your SAML Connection
After you have completed the configuration steps in Lucid and in your IdP, in Lucid click on Test SAML Connection to ensure the configuration is correct. If the test says OK, then SAML has been configured correctly.
If you would like to see more detailed instructions on how to test your SAML connection, reference the Configuring SAML with unofficially Supported IdPs post.
If you would like to assign Google SAML authentication to specific groups, follow the steps below:
- Navigate to the Google Admin console.
- Click Apps.
- Select Web and Mobile apps.
- Select Lucidchart.
- On the lefthand menu below the Lucidchart icon, select the dropdown arrow.
- Search for your group.
- Select your group.
- A window titled: “Apply policies to security groups” will appear.
- After reading through the information, click CLOSE.
- Next to “Service status”, select the checkbox next to ON.
- Click SAVE.