
We recommend using OAuth 2.0 for new integrations. If your account was previously connected using Application Links (OAuth 1.0), you do not need to switch, your existing connection will continue to work. Switching to OAuth 2.0 from OAuth 1.0 will break any existing Lucidspark boards with Jira data; this cannot be reversed. If you’re interested in using OAuth 2.0, refer to our For admins: Configure Lucid Cards for Jira help center article.
If you prefer to set up the integration or continue using it with OAuth 1.0, reference this community post for instructions.
Enable Jira Data Center instance
Note: While the Jira menus shown in this section may differ depending on your version of Jira Data Center, the general setup process is the same.
Ensure your Jira instance is accessible by Lucid’s servers
Ensure that you have public facing DNS and allow inbound requests from the static IPs listed in the table in our For admins: Configure Lucid Cards for Jira help center article.
Create a Jira Application Link and connect Lucidspark
You will need both Jira and Lucidspark admin permissions, in addition to a Lucidspark license, to complete the following steps.
Note: This integration must be configured in Jira using OAuth 1.0. If you are on a newer version of Jira Data Center that uses OAuth 2.0, refer to this article from the Atlassian help center for instructions to access the OAuth 1.0 page before proceeding with the below steps.
To install the Lucid Cards feature in Jira, follow these steps:
- In Jira, navigate to Jira Settings.
- Go to Products.
- Select Integrations.
- Choose Application links.
- Enter "https://lucid.app".
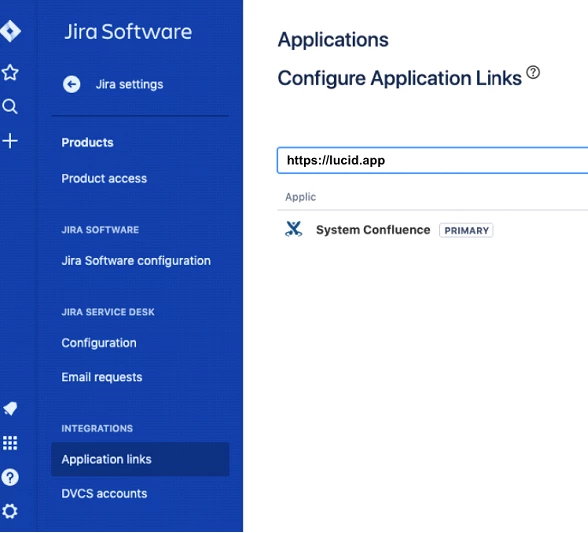
- Click Create new link.
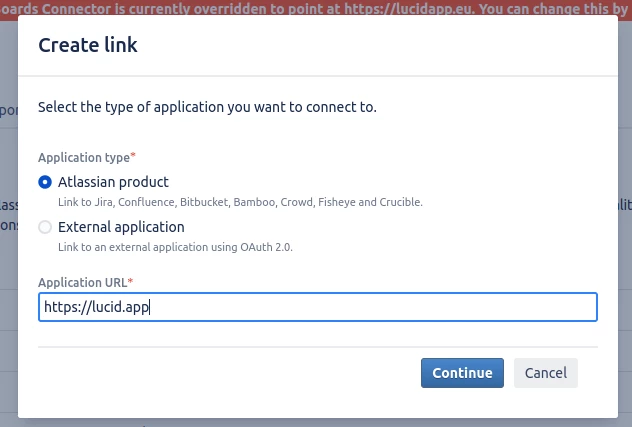
- In the Link applications window, select “Atlassian Product” and type in the following URL:
- Click Continue.
- You may be required to confirm the application URL. If this pops up, add in the URL provided again and press Continue.
- Specify the Application name and type fields.
- Application name: something that represents the Lucid Cards for Jira functionality; such as “Lucidspark-Cards”
- Application type: Select “Generic Application”
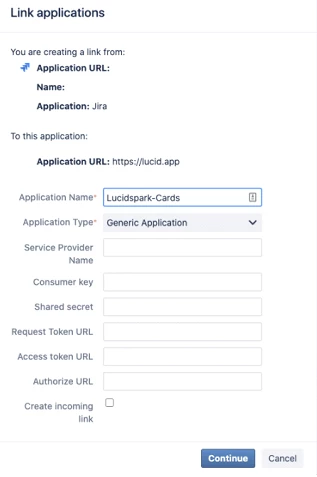
- Click Continue.
You will now connect the Lucidspark-Cards application in Jira to your Lucidspark account. To do so, follow these steps:
- Select the pencil icon on the “Lucidspark-Cards” application.

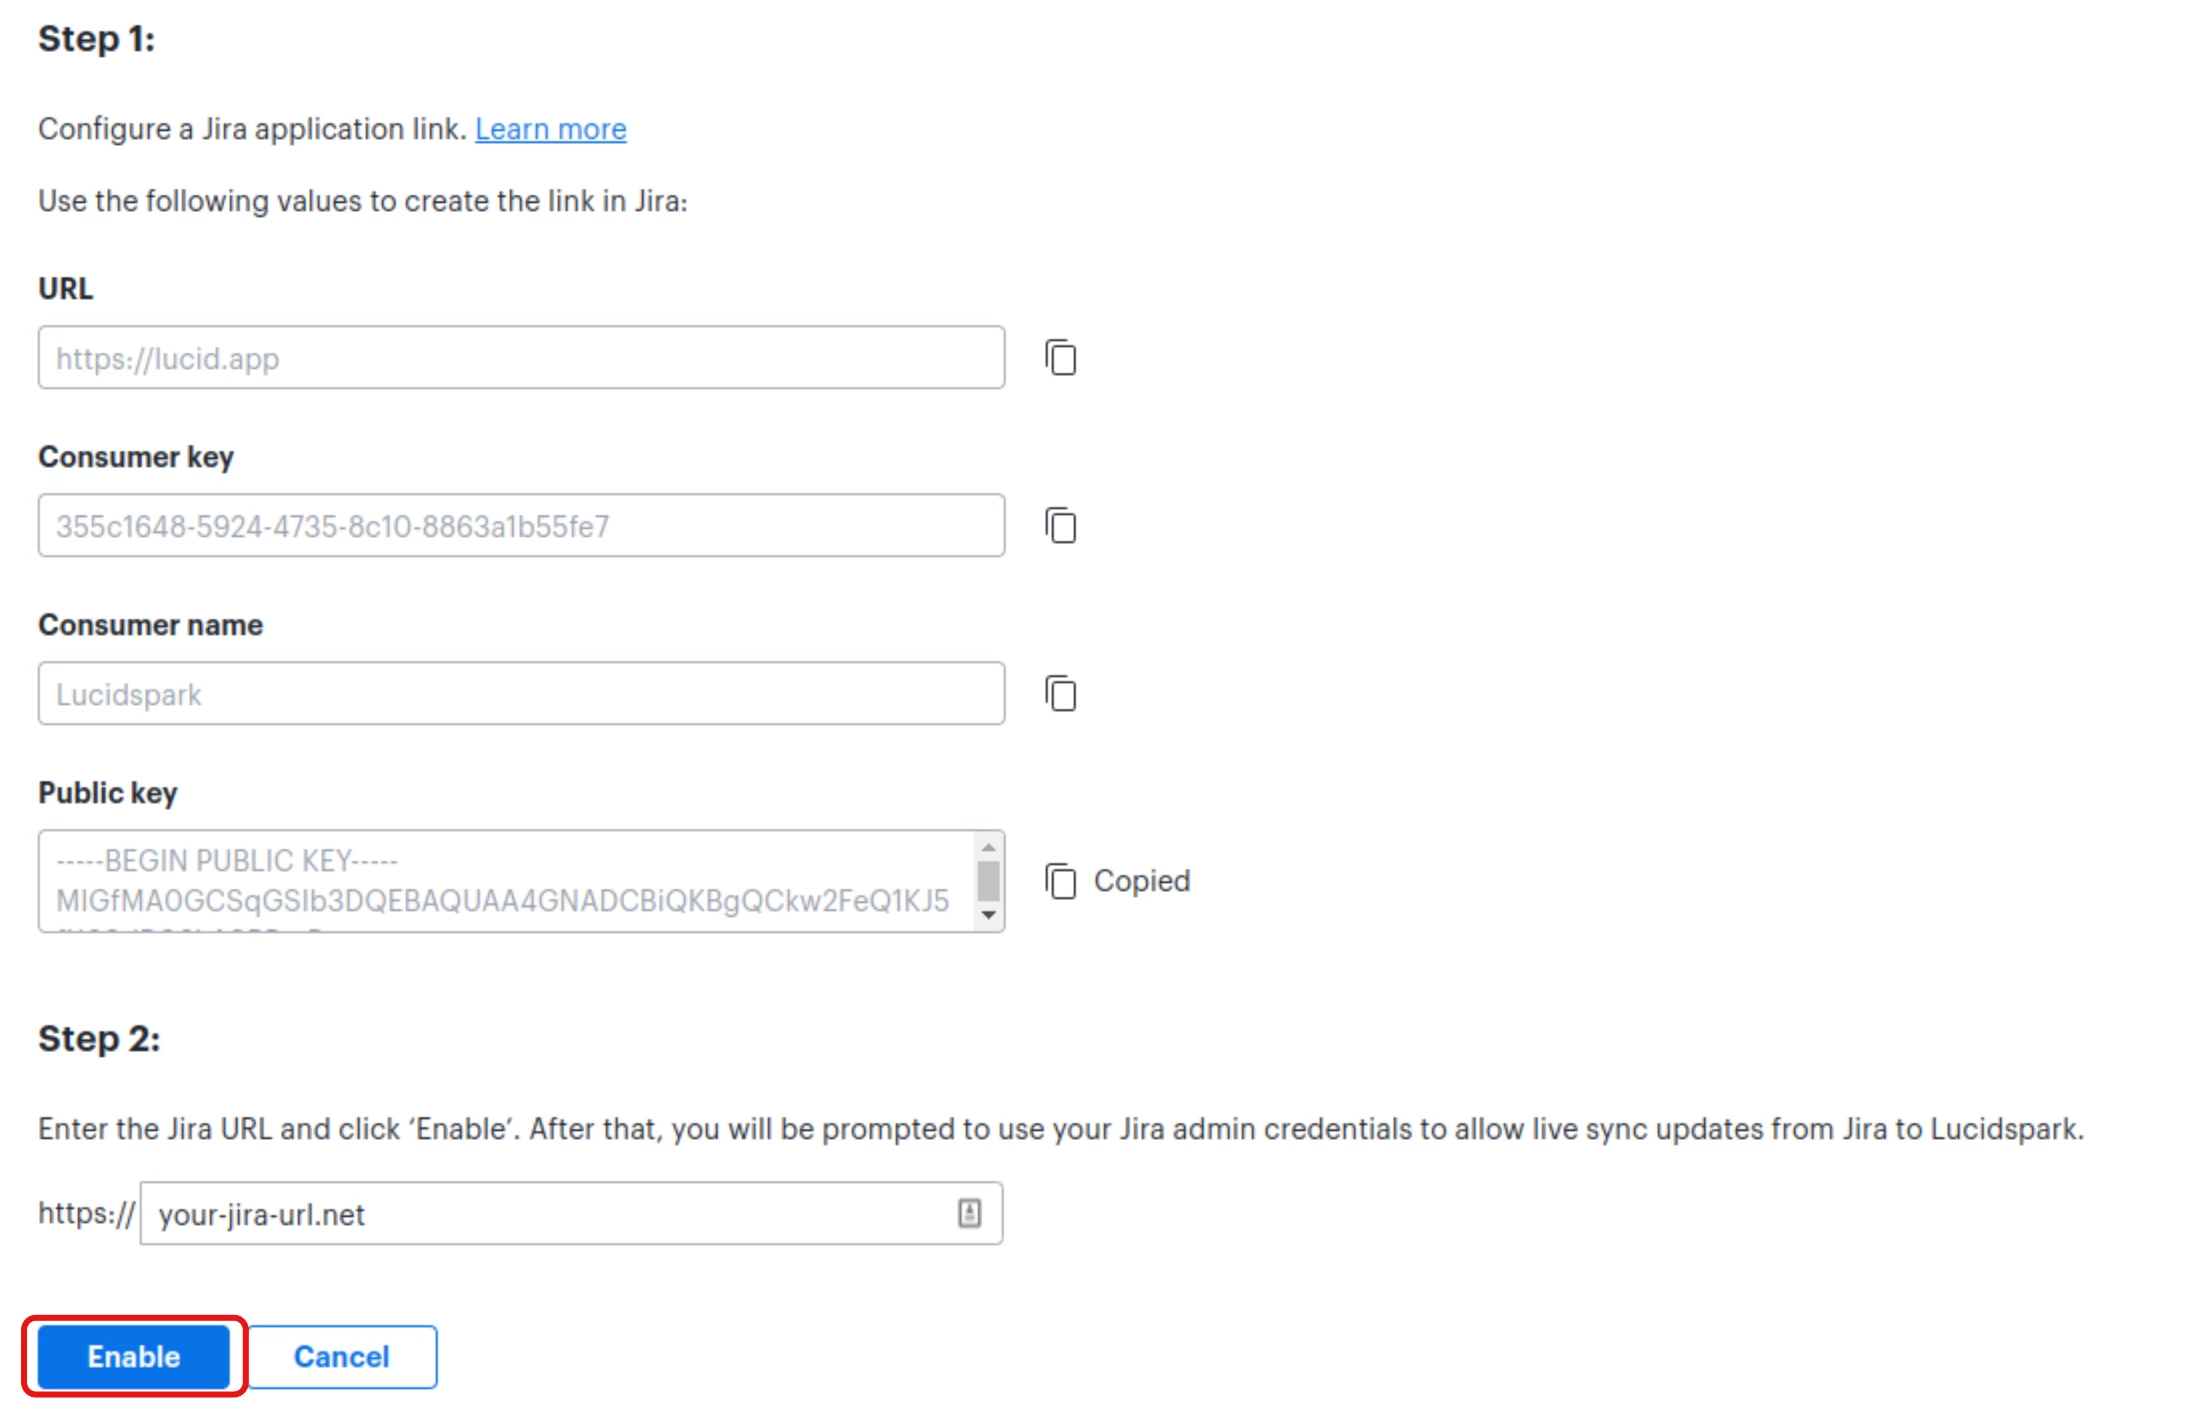
- On the "Application Details" page, input the URL (see the steps below for instructions on finding this value).
- Click on the “Incoming Authentication” tab from the left-hand menu.
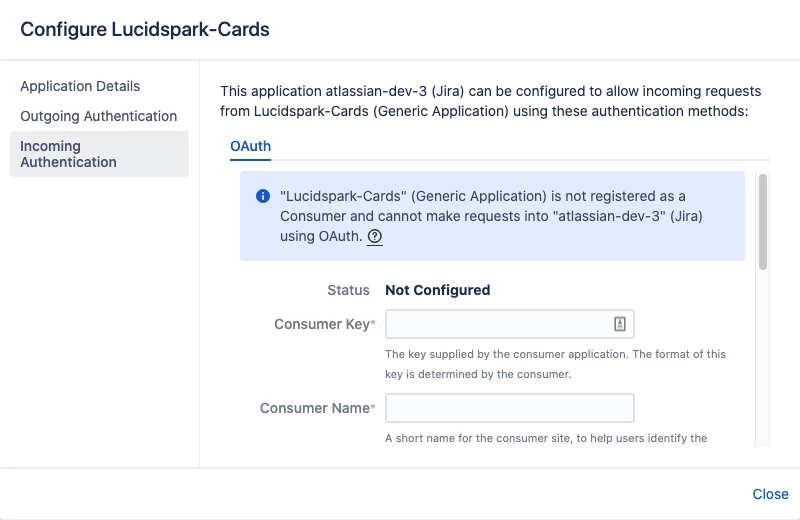
- Input the Consumer Key, Consumer Name, and Public Key values found in Lucidspark (see the steps below for instructions on finding these values).
- Click Save.
To locate the URL, Consumer Key, Consumer Name, and Public Key values that you need to input from Lucidspark into Jira, follow these steps:
- In Lucid, select Admin.
- Select App integration in the left-hand menu.
- From the dropdown, select Lucidspark.
- Locate Jira Data Center and select Settings.
- Enter your Jira URL where prompted.
- Click Enable.
- On the page you’re redirected to, click Allow.
- On the previous page, you’ll see a green check mark and “Enabled”.

Once you have followed the above instructions to connect your Jira instance, you are all set! With the integration installed, end users can now authenticate with their Jira credentials and import and create Jira issues in Lucidspark.
Note: If users usually have to be on VPN to reach Jira Data Center, then they will have to be on VPN during their first Jira authentication through Lucidspark.
For accounts using SSO authentication with Jira
Atlassian doesn’t support 3rd party SSO for Application Links. Per their support page:
“The SSO third party application will intercept any requests coming to the Atlassian application without a legit identity token, and will redirect that request to the SSO application login page.
This behavior is not expected by the Atlassian application, the applications are not designed to handle the redirect, and will not be able to communicate with the third party SSO application.
Thus the handshake for creating the Application link will fail.”
In order to bypass this issue, Atlassian requires users to add the following URLs to the SSO allowed list:
/plugins/servlet/oauth/access-token
/plugins/servlet/oauth/request-token