- As a previous Visio user I experience that my flowchart lines in Lucid have their own strong opinions about where they should go. I keep wrestling and often don't get it my way. Is there any way I can define where the connector shall have its corners?
- Can I also have a line skip nicely over another (or just "pause") while passing it? I'm used to all horizontal lines having priority over the vertical ones and that these pause while the horizontal crosses "over it". Can this be done in Lucid?
- I have lots of processing elements in Adobe Illustrator like a positive displacement (piston) pump. Can I import them so they behave like shapes connectable or must I draw new ones for my special Lucid library? And/or could I edit the offered shapes somehow?
Solved
Line connection control in Lucid
Best answer by Micah
Hi Sven thanks for posting in the Lucid Community! I'm happy to help.
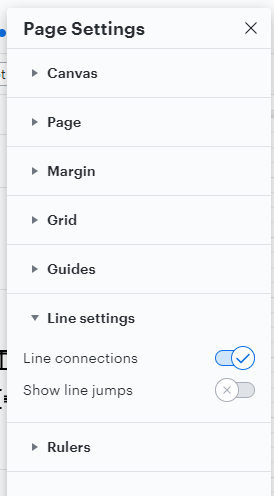
1. For more control over where your lines attach to objects I recommend disabling Line Connections which you can access under File > Document Settings > Lines. Line connections are what cause lines to "reach for" and attach to adjacent shapes and lines in the most efficient pathway and disabling this will allow you to customize connection points to your needs.
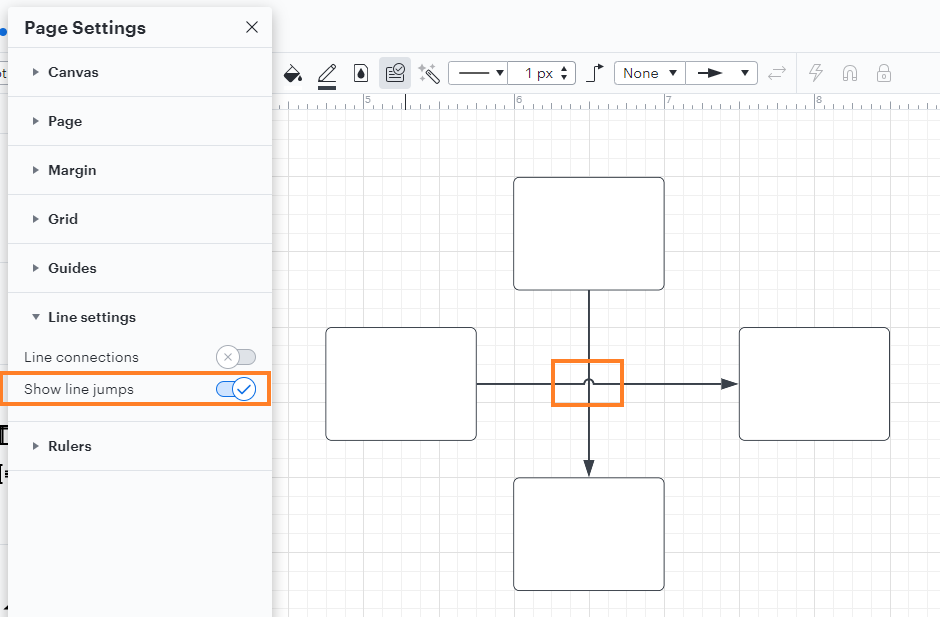
2. Yes you can cause crossing lines to jump over one another. To do so toggle on Show line jumps also under Document Settings.
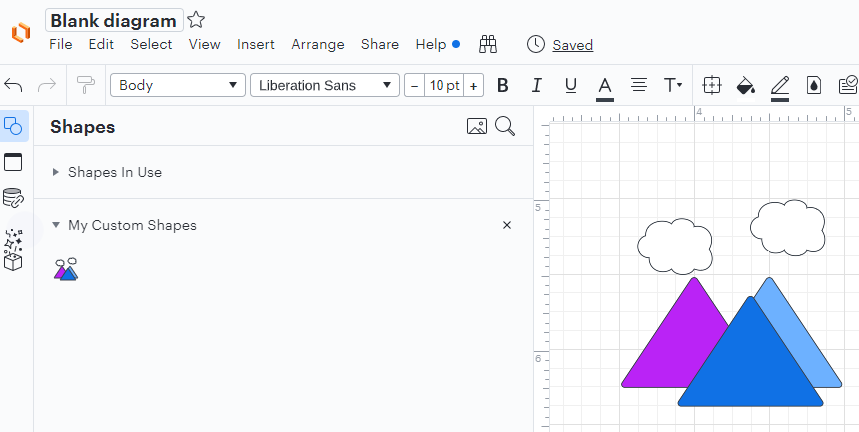
3. Both options that you describe are possible! You can import these processing elements as images or as SVGs both of which are described in full detail in this Shape Libraries article from the Lucidchart Help Center. You can also organize these imported shapes into a custom shape library of your own which you can then use in any document. Regarding editing Lucid shapes - you can save any modifications edits or combinations of Lucid shapes to a custom library to that you can reuse them. For full instructions please refer to the Work with Custom Shape Libraries section of the same article. In my example below I've used a combination of triangle and cloud shapes to create a mountain scene. I've then grouped these shapes then added this as a shape on its own to my custom shape library.
I hope this helps! Please let me know if you have additional questions.

Create an account in the community
A Lucid or airfocus account is required to interact with the Community, and your participation is subject to the Supplemental Lucid Community Terms. You may not participate in the Community if you are under 18. You will be redirected to the Lucid or airfocus app to log in.
Log in to the community
A Lucid or airfocus account is required to interact with the Community, and your participation is subject to the Supplemental Lucid Community Terms. You may not participate in the Community if you are under 18. You will be redirected to the Lucid or airfocus app to log in.
Log in with Lucid Log in with airfocus
or
Enter your E-mail address. We'll send you an e-mail with instructions to reset your password.