
For organizations with users who speak different languages, using Jira Cards and Dynamic Tables can create a frustrating experience. Lucid relies on each individual user’s Jira settings for privacy purposes when syncing data, meaning information is sent to Lucid in the language set in the user’s Jira account. If a user’s Jira language differs from the language used in the Dynamic Table, this can lead to the creation of additional columns in the other language. Additionally, updates made by users with different language settings can cause the card to toggle between columns.
To solve this, you can require all users to have a consistent language in their Jira settings, but in many organizations, this may not be a realistic option. As an alternative, a Jira admin can follow the steps below to override the default translations for fields in company-managed projects in Jira.
Note: This solution only works for company-managed projects, not team-managed projects. For more information about the difference between these two types of projects, check out this resource from Atlassian support.
Steps to override translations for statuses in Jira
Follow the steps below to override the translations from Jira to Lucid for statuses. To complete these steps, you must be a Jira admin.
- In Jira, click the settings icon in the top-right corner.
- Click Issues.
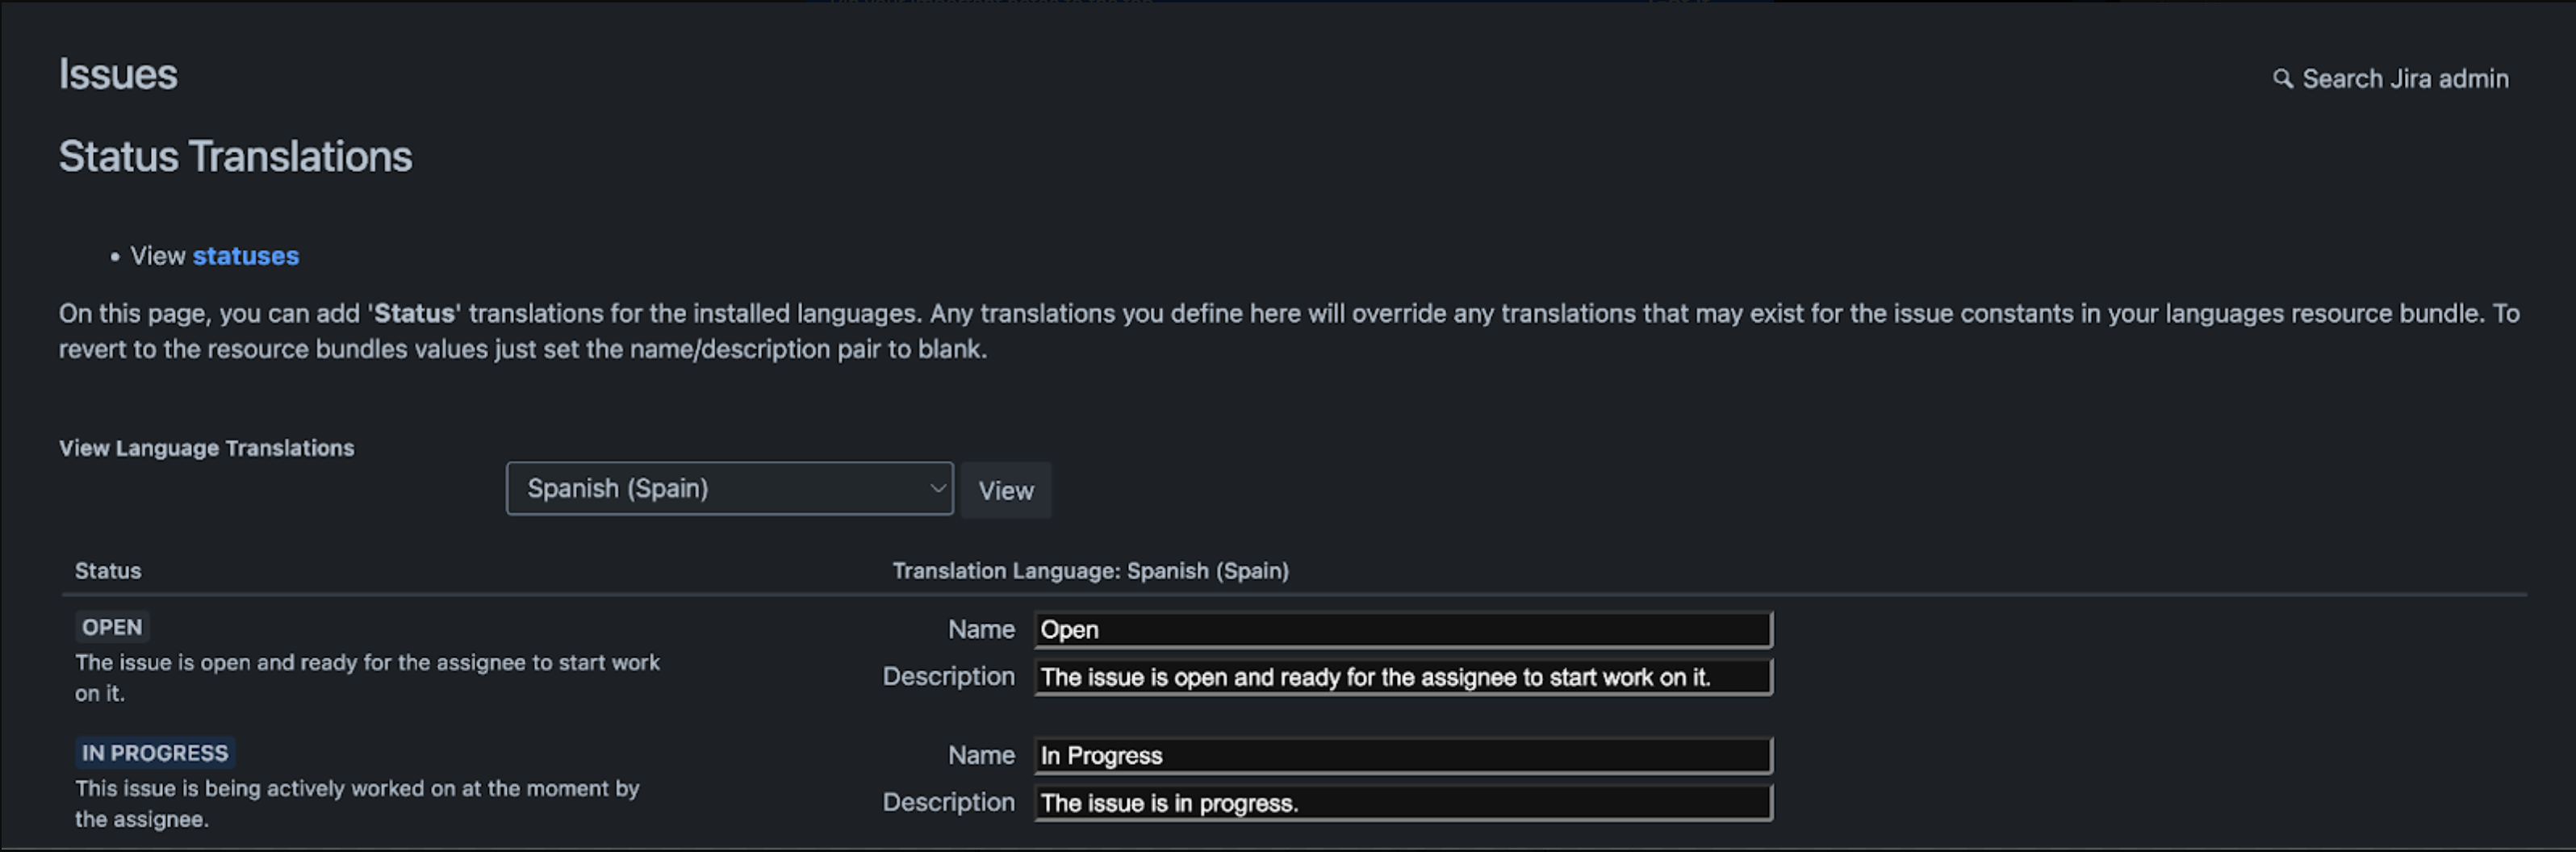
- Select Statuses from the navigation menu on the left-hand side.
- Click Translate statuses from the top-right corner of the table.
- Select a language from the dropdown menu.
- Click View.
- Next to each status option, type the name of each status in the language you want Jira to use.
- For example, if you want statuses to stay in English when sent to Lucid, even when a user is using Jira in Spanish, you would select Spanish from the dropdown, then type the English language names for each status under “Name”.
Repeat these steps for other languages as needed.
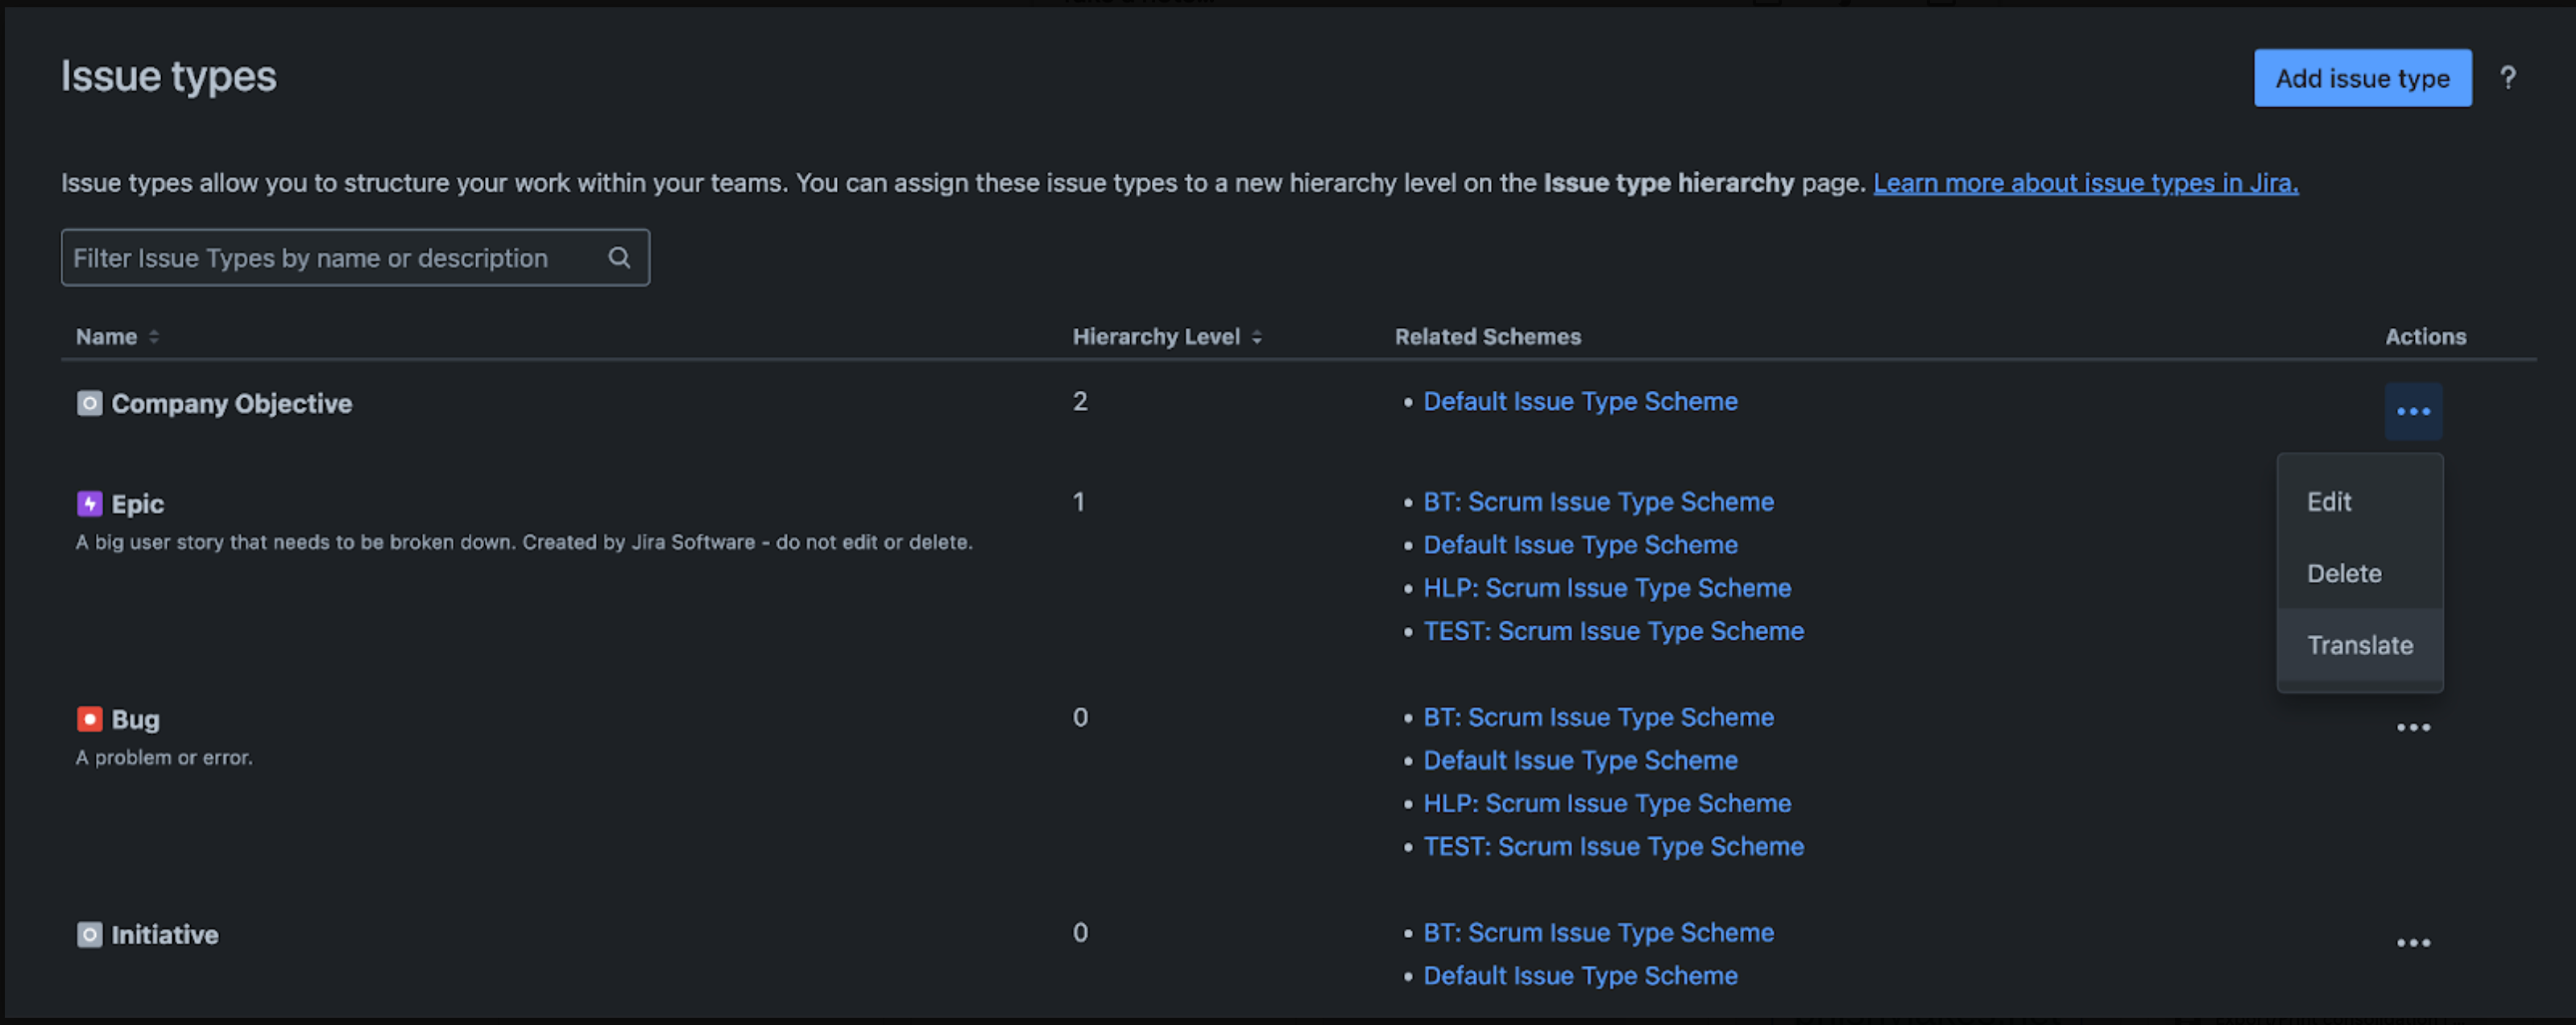
You can follow these steps for other fields such as Issue types, Resolutions, Priority, etc. The “Translate” option may be located in a different spot depending on the field, but typically you can find it under “Actions” to the right of each option.
For a step-by-step visual of this process, check out this video from one of our Product Managers.