Hi Fabre
Thanks for posting on the community! You should be able to edit the text that has been grouped with the shape. To do this you will need to double-click on the grouped shape and then double-click on the text box (see gif below). 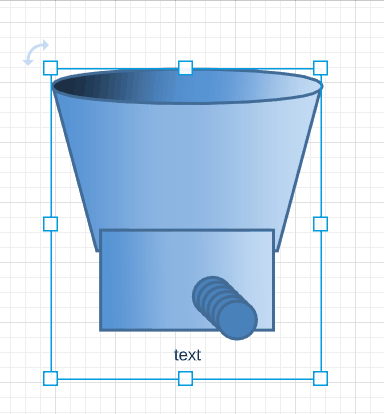
For your other question could you send a screenshot of what you mean the the icon is much smaller. Thanks!
Hope this helps!
Hello
The example shown by Clara is not exactly what is being asked.
Shapes like the AWS 2019 library allow for double clicking on the shape itself to change the text. It is not a separate text box. Additionally when resizing the shape it automatically manages the positioning of the shapes.
Creating custom shapes which consists of grouped objects does not provide the same flexibility and makes usage of these shapes more cumbersome for users especially if you are trying to create template objects for a broad number of users to rely on.
Is it possible to do this with our own custom shapes? If not is it planned to enable us to do this?

Here's an example of why the method Clara shown is not really workable. Note how the arrangement of the two grouped objects would require manual arrangement to be usable.
I believe there's also no native ability to create lines from custom group shapes which are grouped.
Hi Sean
Thank you for continuing this thread.
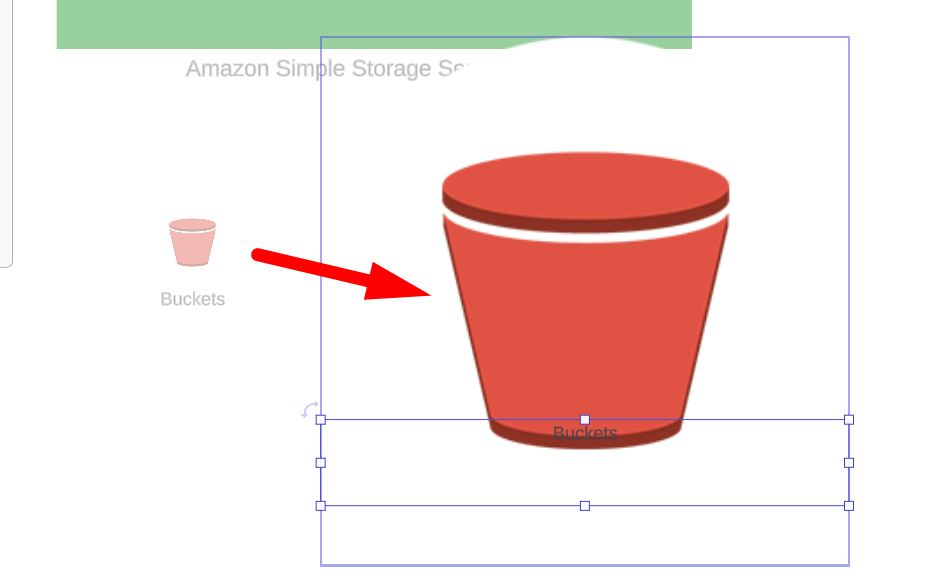
Clara's method for adding text to custom shapes as demonstrated above is the most effective way to include text to the bottom shapes that typically do not support text. If you're seeking a method where the text automatically adjusts its position to shape changes please follow these tips:
1. Ensure that your text box is sized to match the width of the shape's bottom. This will allow the text to adapt as the shape's size changes.
2. Position your text box accurately. Align the top of the text box (outlined in purple) with the bottom of your shape’s purple box that appears when selecting your shape. Watch for the thick purple line when positioning your text box as this line indicates you are positioning it at the bottom of the shape box.
Note: If the text box crosses over the shape box that appears when you click on the shape it may cause the text to overlap the shape when you resize it. The best way to ensure this doesn’t happen is to make sure that the shape box is as flush with the shape as possible and make sure the thick purple line pops-up when placing your text box.
Gif: Without Purple line placement vs. With purple line placement
3. Adjust your text alignment to be top-aligned. This aligns your text with the top of the text box making it flush with your shape.
4. Remember to save the shape and text box as a grouped shape and add it to your shape library for convenient access and future use
Gif: The Entire Process
Additionally with this method of adding text you will need to make text adjustments by double-clicking on the grouped shape and then double-clicking on the text box. Apart from Clara's method and the tips mentioned above there is unfortunately no other native way to add text to the bottom of shapes that don’t have it built in.
I hope this helps and comment any additional questions below.