This post provides instructions on how to connect a custom IdP that supports SCIM 2.0 with Lucid to provision users, groups, and group memberships. The prerequisite for this guide is to have a configured SCIM 2.0 application in your IdP that can be used to connect to Lucid.
Note: If you are using Okta or Azure, we recommend checking out our SCIM overview help center article. It will direct you to a resource for each of these officially supported IdPs.
In this article, “group push” or “push groups” refer to groups you’ve created in your IdP/SCIM provider which you’ve used to create corresponding groups in Lucid via SCIM request. Please refer to our SCIM API documentation here for an example.
Obtain bearer token and enable SCIM provisioning
Obtain bearer token in Lucid
Before enabling SCIM provisioning, you need to obtain a bearer token from Lucid. To do this:
- Sign in to Lucid as an account owner or account admin.
- Select Admin from the menu to the left. You’ve now reached the Lucid admin panel.
- Click App Integration from the left-hand navigation menu.
- On the SCIM tile, click Settings.
- Click Generate Token.
- If Generate Token is not clickable, ensure the “Automatically upgrade account when no more licenses are available” option is checked in your License settings and try again.
Keep this page open as a tab, as you will return shortly.
Create an “All Users” group
To create an “All Users” group in your IdP, navigate to the group assignments page within your application. From this page:
- Assign an “All Users” group. You can customize the group name, but remember it for later!
- This should be the group to which all new users at your company are automatically added. This allows all assigned users to sign into the Lucid application (if SAML has been configured) and provisions all users in this group as limited-access users.
Exclude “All Users” group from organizational groups in Lucid
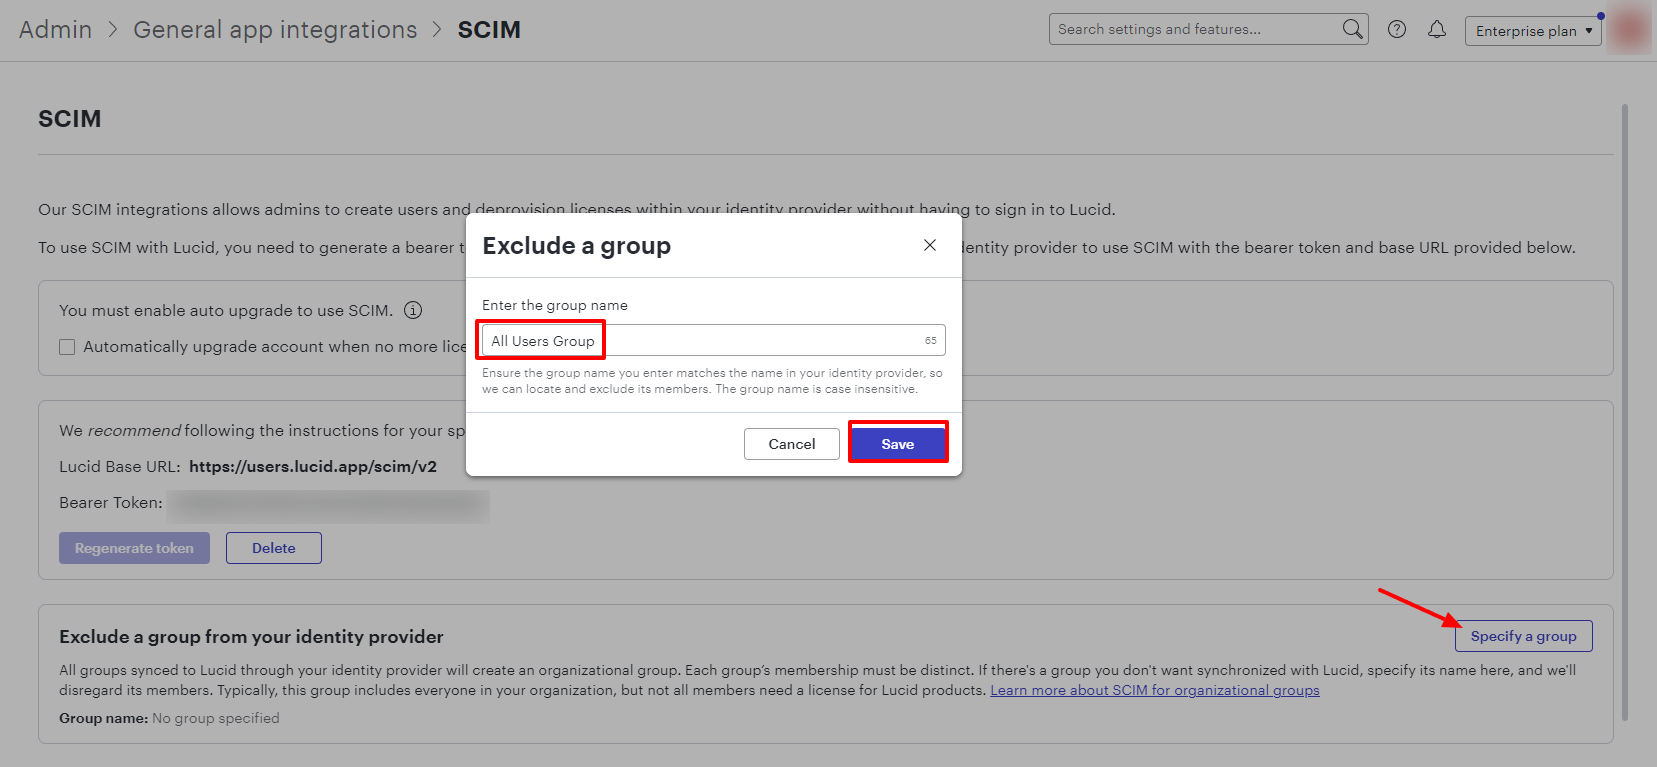
Navigate back to to the SCIM app tab in Lucid that you previously left open. From here, you will exclude your “All Users” group from your identity provider:
- Click the Specify a group button under “Exclude a group from your identity provider”.
- Type in the name of your “All Users Group” from your IdP.
- Your “All Users Group” will most likely be named something different and it must be an exact text match with the name you gave it in your IdP.
- The purpose of this setting is to make it so that Lucid doesn’t license any of the users that belong to this “All User Group” and so that users can belong to this group in addition to either a licensed or a delicensing group.
- Click Save.
Create push groups
In this section, we will walk you through our recommendations for the new user groups to create in your IdP that can then be used to license/delicense users in Lucid.
- Create a “Lucid Suite Licensed Users” group and assign applicable users to this group.
- Users assigned to this group must not also be assigned to the “Lucid Suite Limited Access/Read-Only/Delicensing” group since it is used to grant a license to a user.
- Create a “Lucid Suite Limited Access Users” group and assign applicable users to this group.
- Users assigned to this group must not also be assigned to the “Lucid Suite Licensed User” group since it is used to remove a license from a user.
- (Optional) Follow steps one and two to add any additional groups that you want to show up as organizational groups in Lucid.
Ensure you see push groups in Lucid
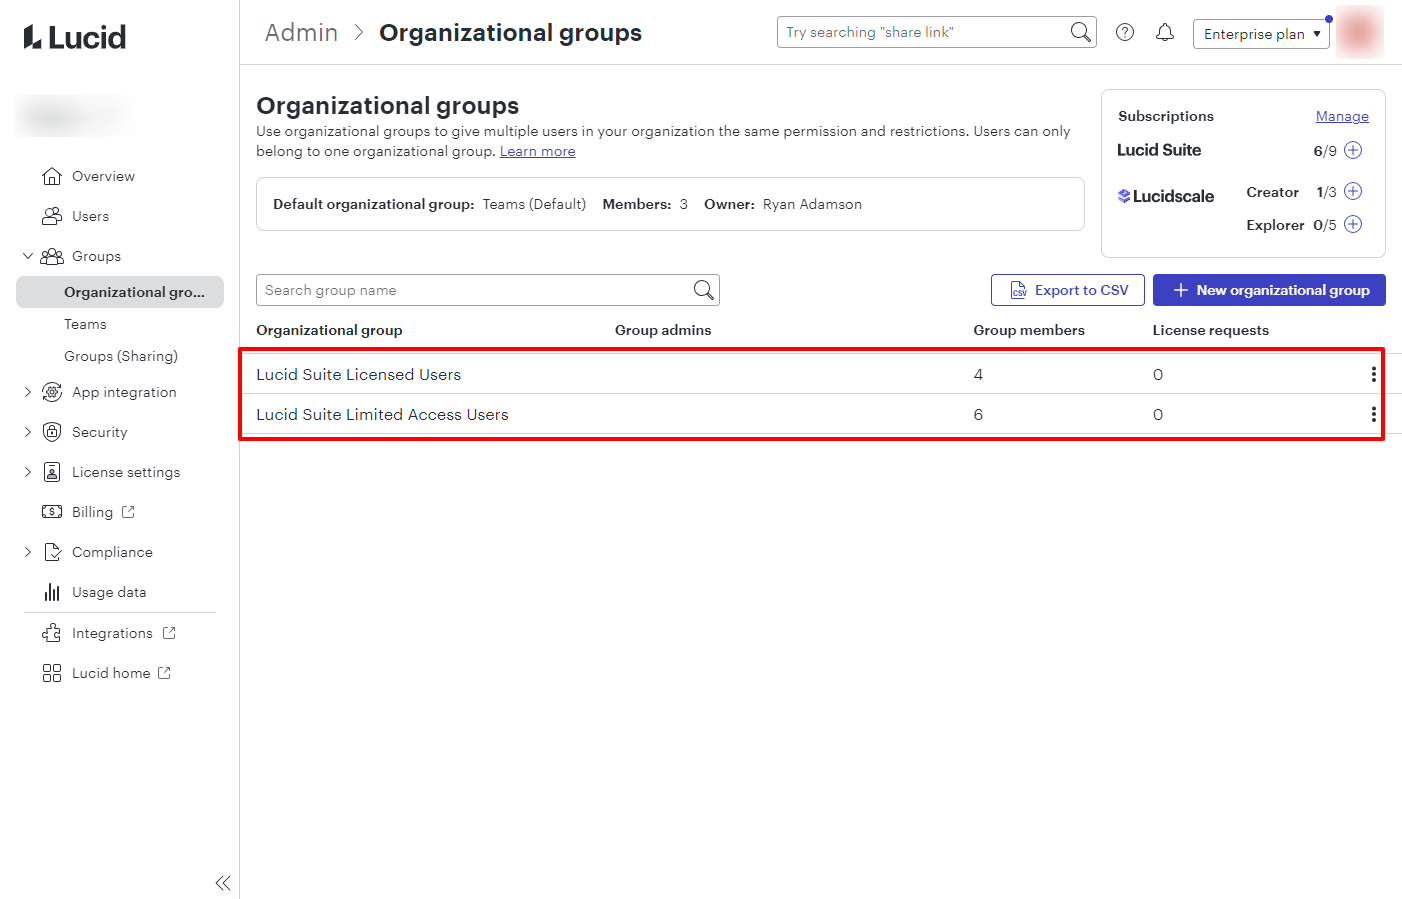
To make sure you are successfully seeing the push groups you created as org groups in Lucid, follow these steps:
- Navigate to the Lucid admin panel.
- Select Groups from the left-hand menu.
- From the dropdown options, click Organizational groups.
You should now see your push groups as organizational groups in Lucid.
Note: You WILL NOT see the All Users Group since it wasn’t assigned as a Push Group. However, all users from that group will show up into your “Default organization group” automatically.
Configure license settings for each group
You’re now at the stage in the process where you can configure the license settings for each of your organizational groups. This ensures users are licensed or delicensed as intended when they are added to or removed from either of these groups. To access license settings, follow these steps:
- Navigate to the Lucid admin panel.
- Select License settings from the left-hand navigation menu.
- From the dropdown menu, click Lucid Suite settings.
- Proceed to the appropriate set of steps below to customize license settings for each organizational group.
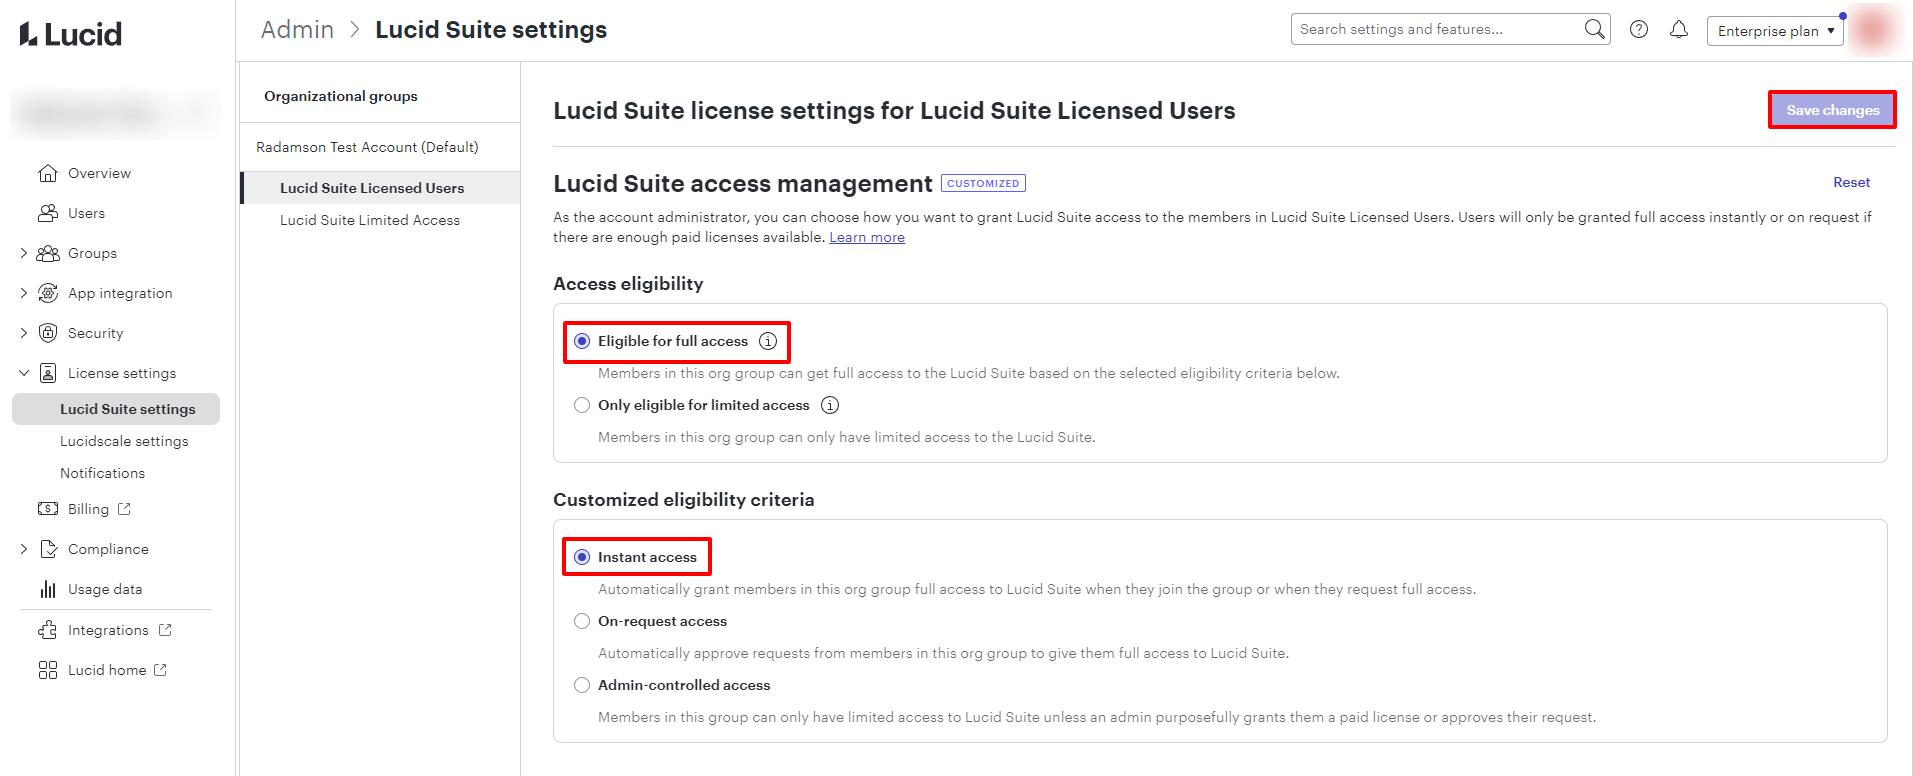
License setting set up for licensed users group:
- Click Lucid Suite Licensed Users from the list of organizational groups on the left-hand side of the licensing page.
- Under the “Access eligibility” section, select Eligible for full access.
- Under “Customized eligibility criteria”, select Instant access.
- Click Save changes.
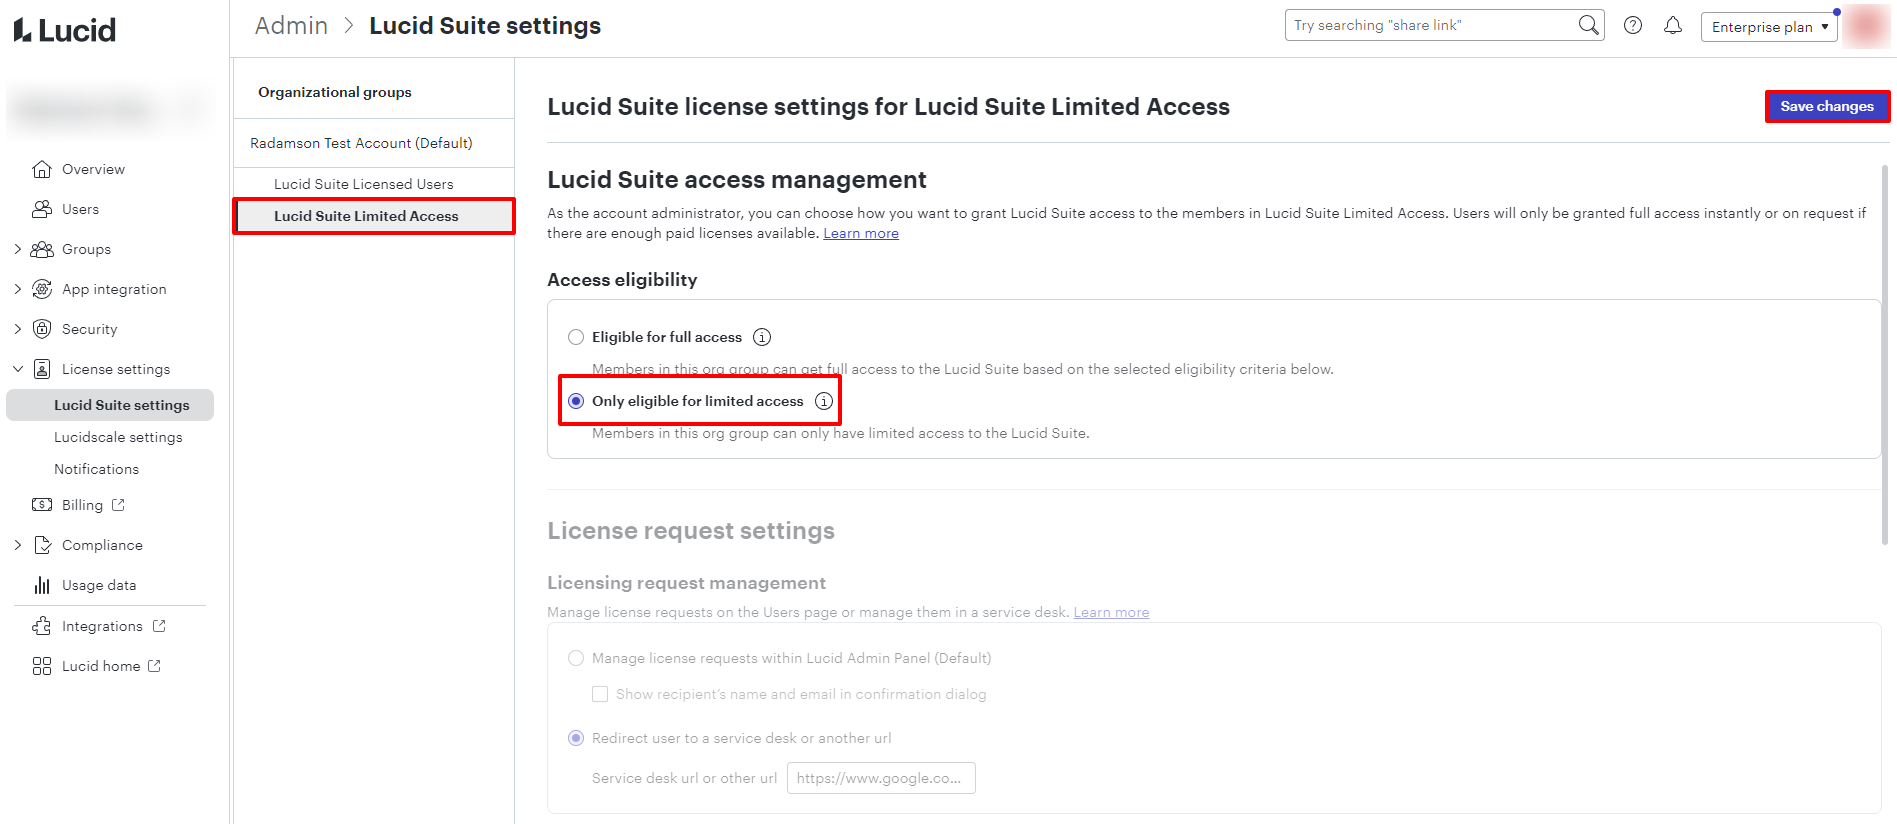
License setting set up for limited access group:
- Click Lucid Suite Limited Access Users from the list of organizational groups on the left-hand side of the licensing page.
- Under the “Access eligibility” section, select Only eligible for limited access.
- Click Save changes.
- In the pop-up window that appears, you will be informed that all current and future members of this group will be delicensed by Lucid.
- The purpose of this group is to host limited-access users here, so this is expected.
- If you are in acceptance of the stipulations expressed above and in this pop-up confirmation window, click Save changes.
You have now completed all the steps to successfully configure the Lucid app. License settings will now be managed via the organizational groups created via SCIM.