Integrate your Lucid Enterprise account with Ping Identity to enable your users to authenticate using SAML single sign-on (SSO) through your identity provider (IDP). These setup instructions are applicable to the Ping Identity products: PingID, PingOne, and PingFederate, but for the sake of this article, we'll refer to it simply as Ping.
The purpose of this post is to provide instructions on how to configure Ping SAML to work with Lucid. This is not an officially supported IdP, so you may notice that the instructions or screenshots in Ping may become outdated over time.
Before proceeding with the steps in this guide, please refer to the Lucid SAML authentication instructions provided in the Configuring SAML with unofficially Supported IdPs post.
To configure Ping to work with Lucid, follow these steps:
- Log into your Ping Identity account.
- Navigate to your Ping Identity Admin console.
- Select Your Environment.
- Click Connections.
- Click on the Applications drop-down menu
- Select Applications
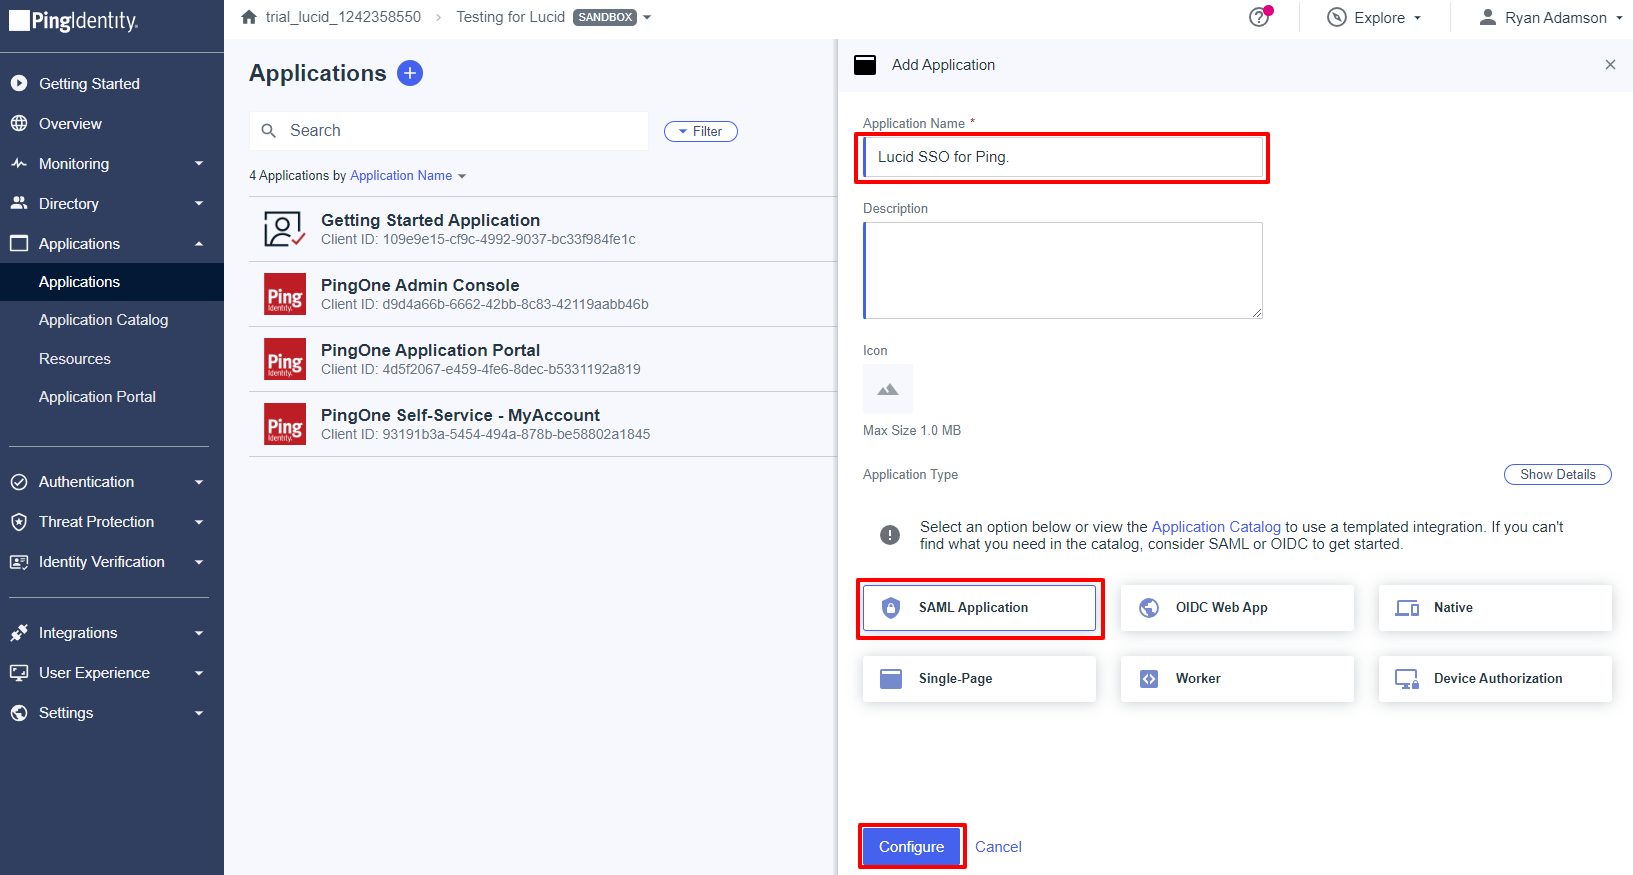
- Click the + icon.
- Enter a name for your application. This can be something similar to “Luicd SSO for Ping”.

- Select Manually Enter.
- Click Configure.
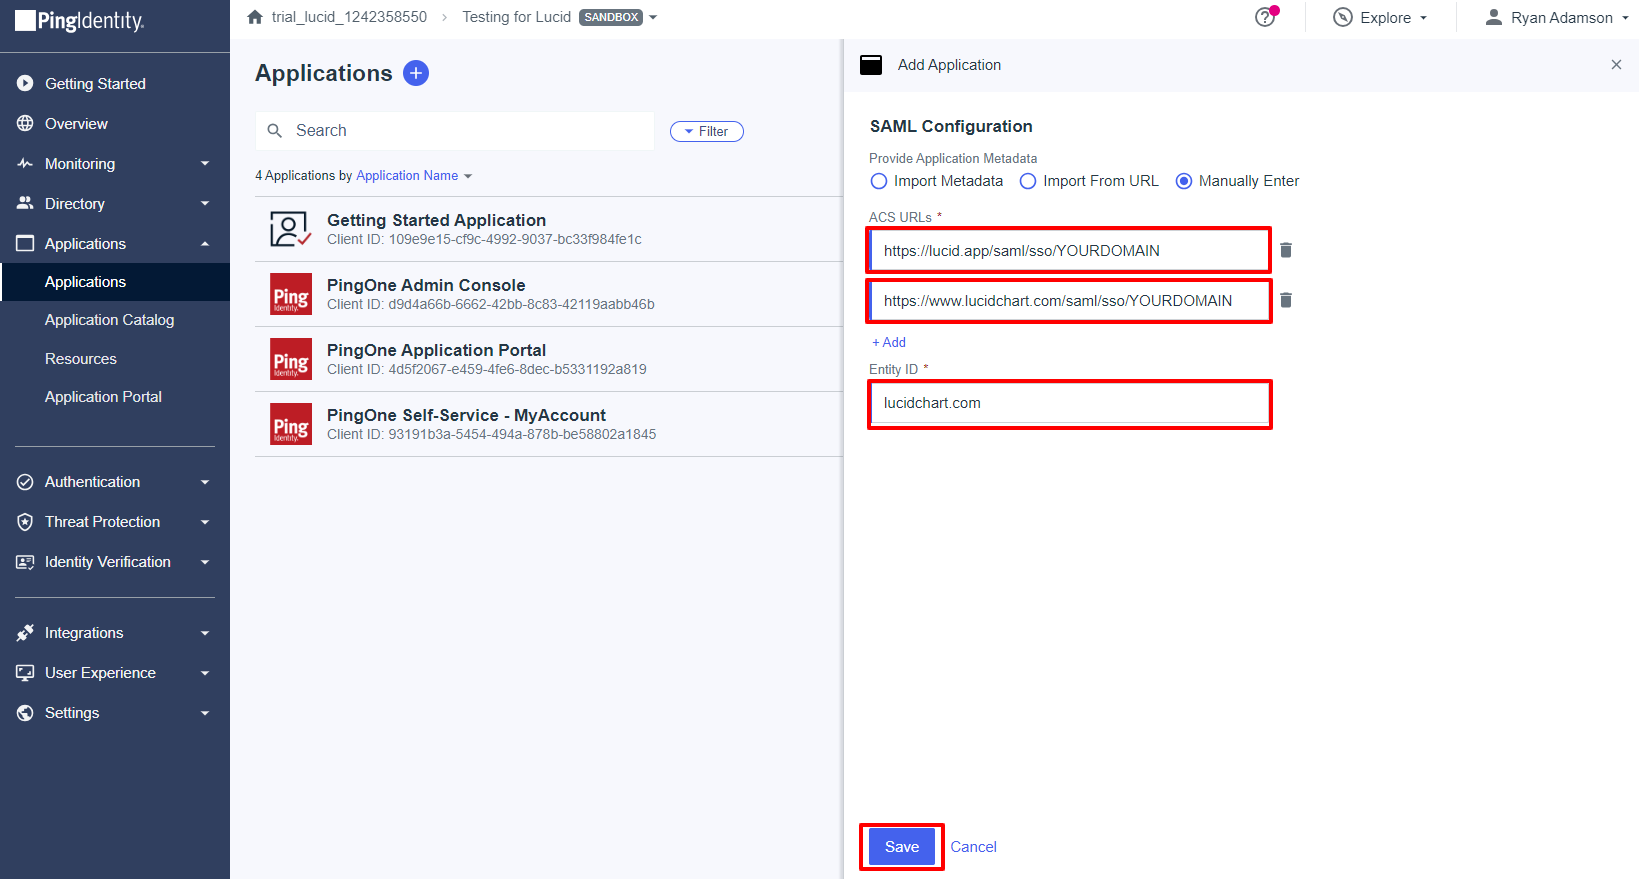
- Click the +Add to create a second ACS URLs field.
- Using the value you added to the domain field in Lucid from step #5 of the Configuring SAML authentication post, add it to the end of the following two URLs
- https://lucid.app/saml/sso/YOURDOMAIN
- https://www.lucidchart.com/saml/sso/YOURDOMAIN
- Enter these URLs into the ACS fields in Ping.
- Add the default value of lucidchart.com in the Entity ID field.
- Click Save.

- Click on the Configuration Tab.
- Click Download Metadata. This will download an XML file to your computer to be uploaded in Lucid.
Return to Lucid:
- Navigate to the Admin Panel.
- Click App integration.
- Select SAML.
- Click Settings
- Click + Add identity provider
- Upload the downloaded XML metadata file from step #17 of the section above.
If you would like to see more detailed instructions, reference step #7 of Configuring SAML with unofficially Supported IdPs.
Return to the Ping:
- Click Access.
- Click the pencil icon.
- Search for the group you want to add that will use this SSO application to sign into Lucid.
- Once you find the group, select the check box next to it.
- Click Save.
- Enable the application by toggling the switch at the top of the page.
- Select the Access tab.
- Ensure that either the admin or a group you belong to has been assigned to this application within PingIdentity.
Testing your SAML Connection
After you have completed the configuration steps in Lucid and in your IdP, in Lucid click on Test SAML Connection to ensure the configuration is correct. If the test says OK, then SAML has been configured correctly.
If you would like to see more detailed instructions on how to test your SAML connection, reference the Configuring SAML with unofficially Supported IdPs post.
