You have the option to configure title and department field mappings in SCIM. To do so in Okta, follow these steps:
- To include these additional fields in your SCIM push to Lucid, navigate to the Provisioning tab.
- If “To App” is not already selected, select it.
- Scroll down on the page and click Go to Profile Editor.
- Click + Add Attribute and enter the following information:
- Display Name: Title
- Variable Name: lucid_title
- External Name: title
- External Namespace: urn:ietf:params:scim:schemas:core:2.0:User
- Click Save and Add Another, then enter the following information:
- Display Name: Department
- Variable Name: lucid_department
- External Name: department
- External Namespace: urn:ietf:params:scim:schemas:extension:enterprise:2.0:User
- Click Save.
- Navigate back to your Lucid application in Okta, and select Provisioning.
- Scroll down on the page and locate the two attributes you created in steps 4-5.

- You may need to unhide hidden attributes by clicking the Unhide Unmapped attributes button underneath the attributes.
- Click the pencil icon to the far-right of one the attributes.
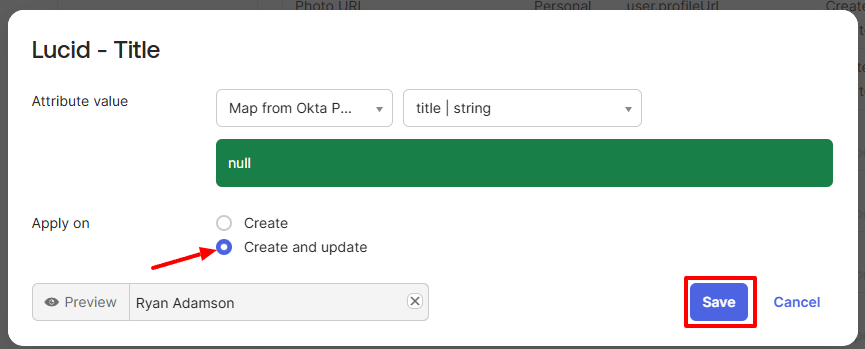
- Click the drop-down menu and select Map from Okta Profile.
- In the second drop-down menu that appears, search for the particular attribute you selected.
- For the title attribute, search “title” and select title | string.
- For the department attribute, search “department” and select department | string.
- Then select Create and Update.
- Click Save.

- Here is an example of what this process looks like for the title attribute.
- Repeat steps 9-13 until you have completed the steps for both attributes.
- If done correctly, your attributes should look like this:

These fields will now populate for this user within Lucid as long as there are values in the fields within Okta.
