A Virtual Private Cloud (VPC) houses a variety of resources including routing regions subnets and availability zones. Lucidscale has a built-in view that will help you quickly focus on your VPC topology so you can have an accurate view of the relationships between your VPCs.
1. Import your architecture into the Data Hub. Navigate to the Data Hub in the left-side panel of the Lucid homepage and select “+ New Account'' to pull in cloud provider metadata and get an accurate picture of your current state. Lucidscale works with AWS Azure and GCP. For more detailed instructions check out our Help Center articles on importing your data.
2. Create new model in Lucidscale. Auto-generate a model from your imported data. You’ll be able to apply filters customize views show connected resources and more.
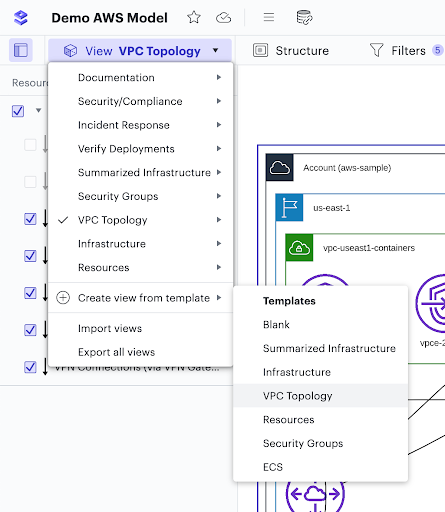
3. Apply the VPC Topology View. When you generate a new Model your rendered infrastructure will automatically display in the Summarized Infrastructure view. You can select VPC Topology from the dropdown menu.
4. Use filters to tailor the VPC Topology view.
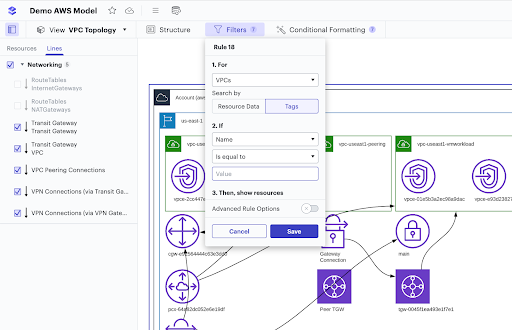
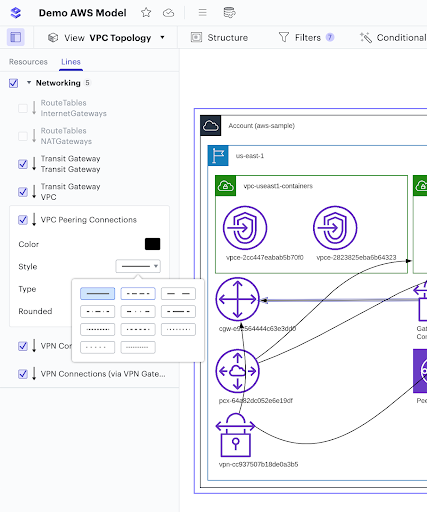
Filters can help you further refine your view. You can also toggle lines on and off to verify that resources are connected correctly and that no connections are missing.
Look for connections that are configured incorrectly with quick easy-to-use conditional formatting rules that can target any piece of metadata. You can customize your diagram to only see specific VPCs highlight default VPCs monitor transit gateways and more.
5. Understand your VPCs and their connections. Using Lucidscale to generate VPC diagrams will save time and preserve the accuracy of your documentation.
If you’re ready to propose updates and improvements see how our suite of tools is more powerful together.