Using templates can streamline the sharing of virtual worksheets, assignments, or graphic organizers with students!
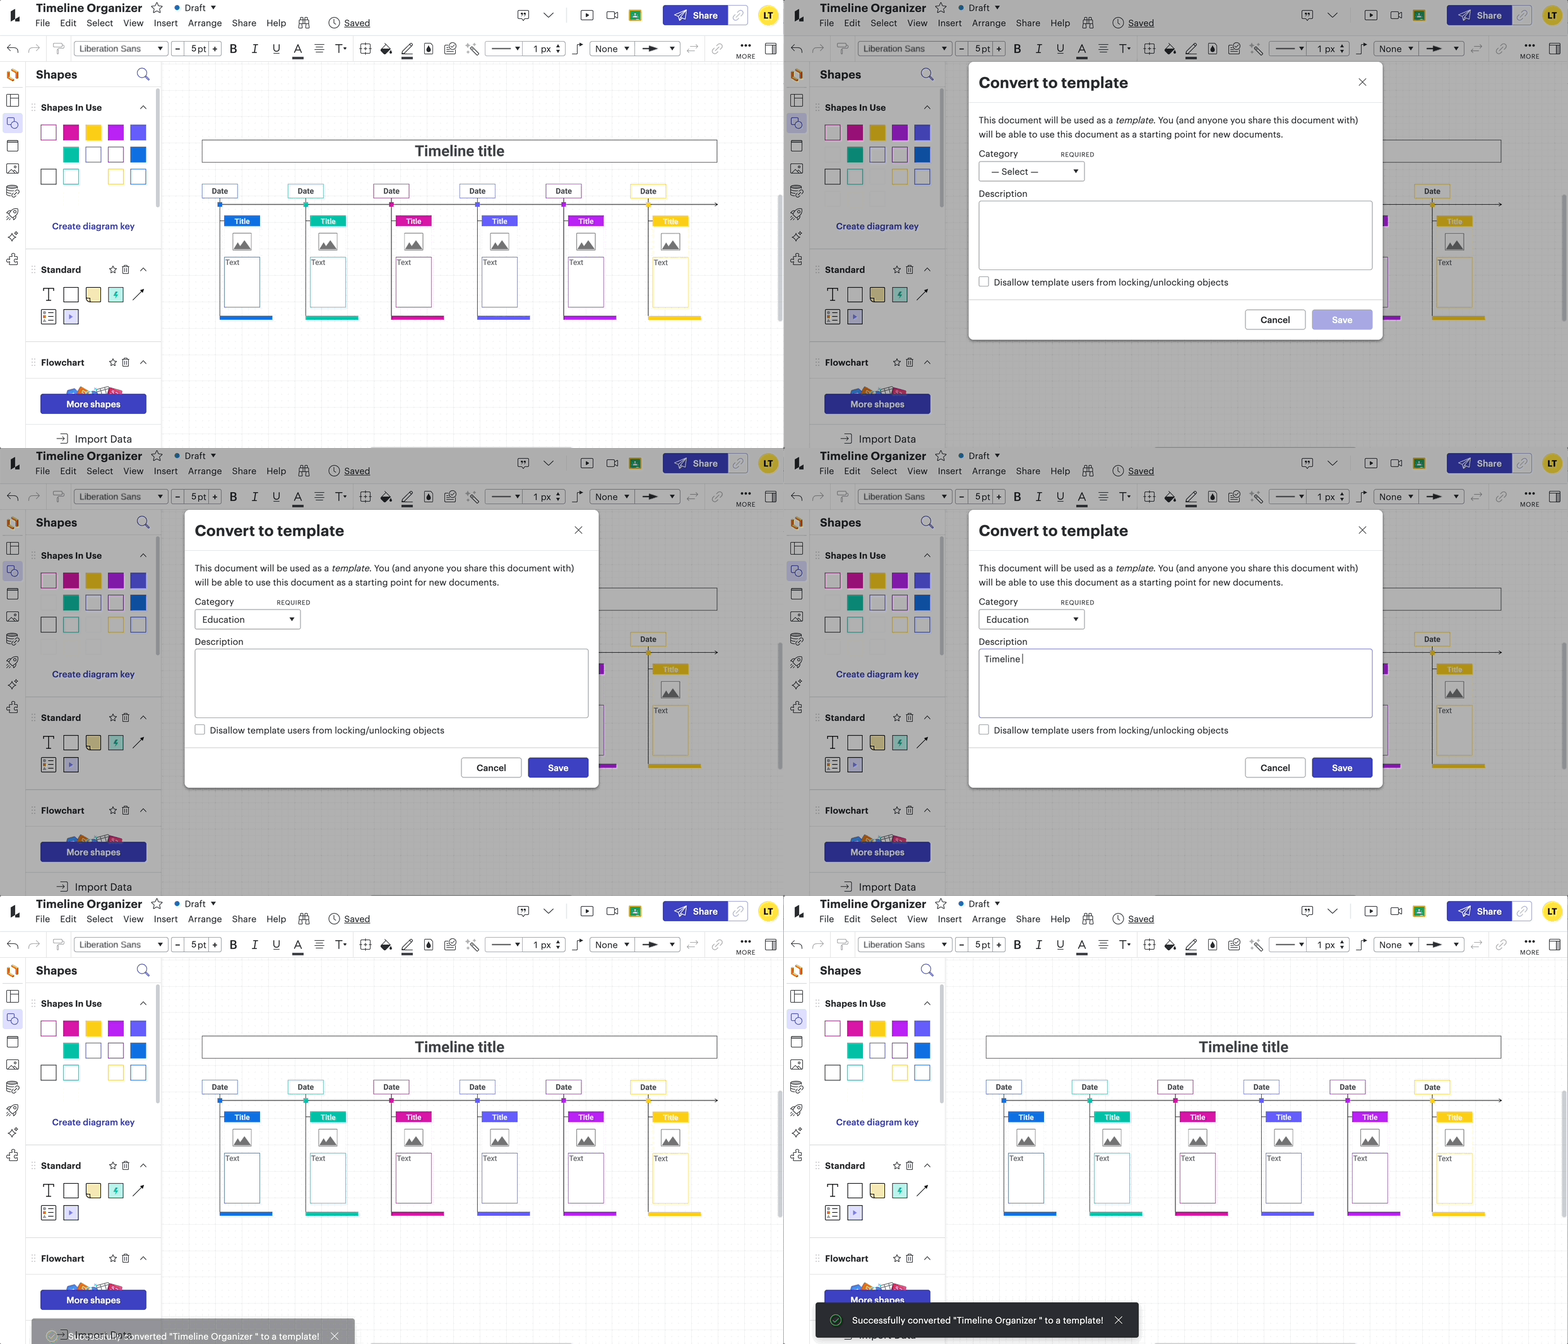
Check out these steps for converting your Lucid documents to templates:
- Select your Lucid document.
- Choose File > Convert to template.
- Select the category of your template.
- Optionally, add a description of your template.

Once you've converted your document to a template, any edits you make will be applied to the original template.
Now that you've created your template, you're ready to share it with your students! Using folders is a great way to keep assignments organized and share your templates quickly. You can create a folder based on the class period, unit, or assignment.
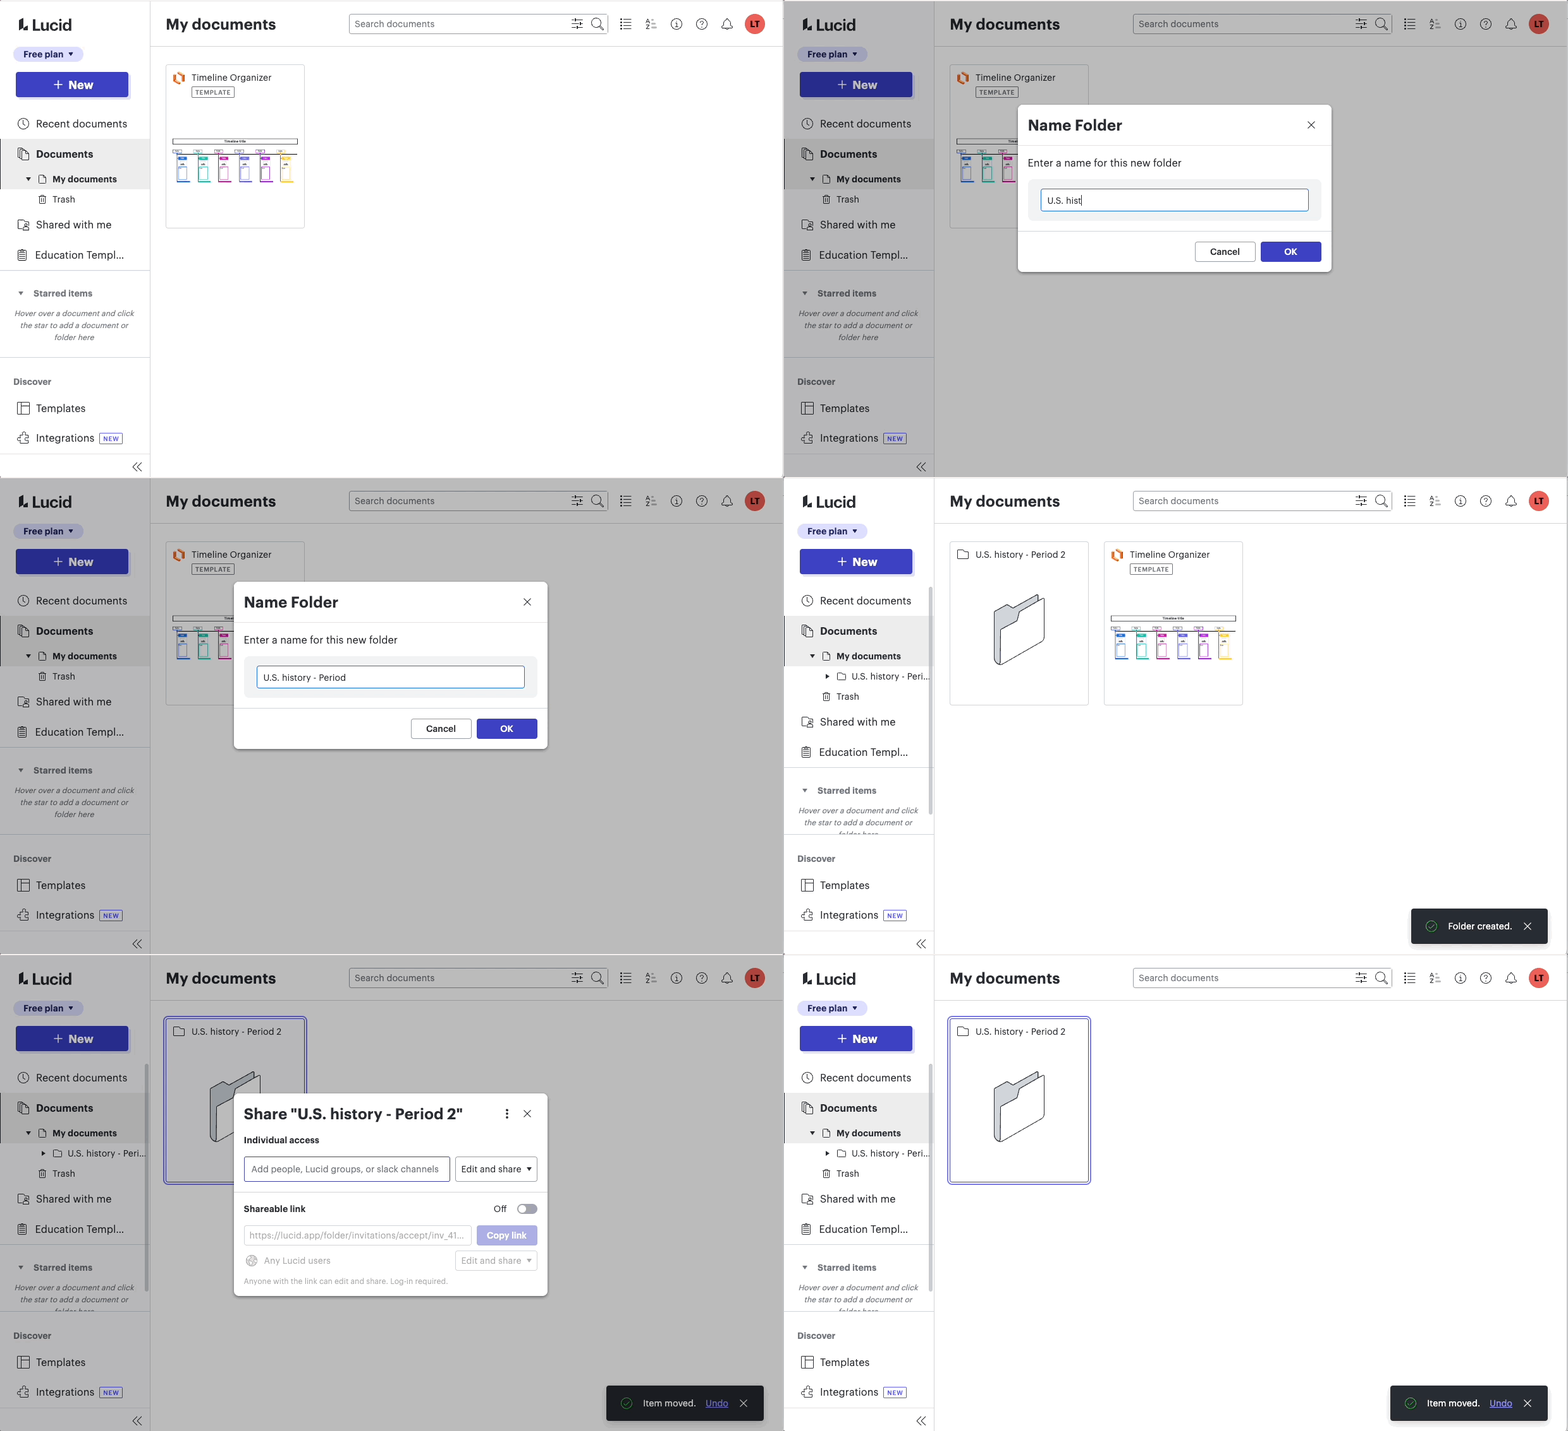
Check out these steps for creating and sharing folders with your students:
- From your Documents page, select +New > Folder.
- Title your folder (e.g. U.S. History - Period 2).
- Move or add your template to the folder you created.
- Select the three vertical dots on your folder and choose “Share”.
- Share the folder directly with your students by adding their email addresses, or create a link to the folder and share the link.

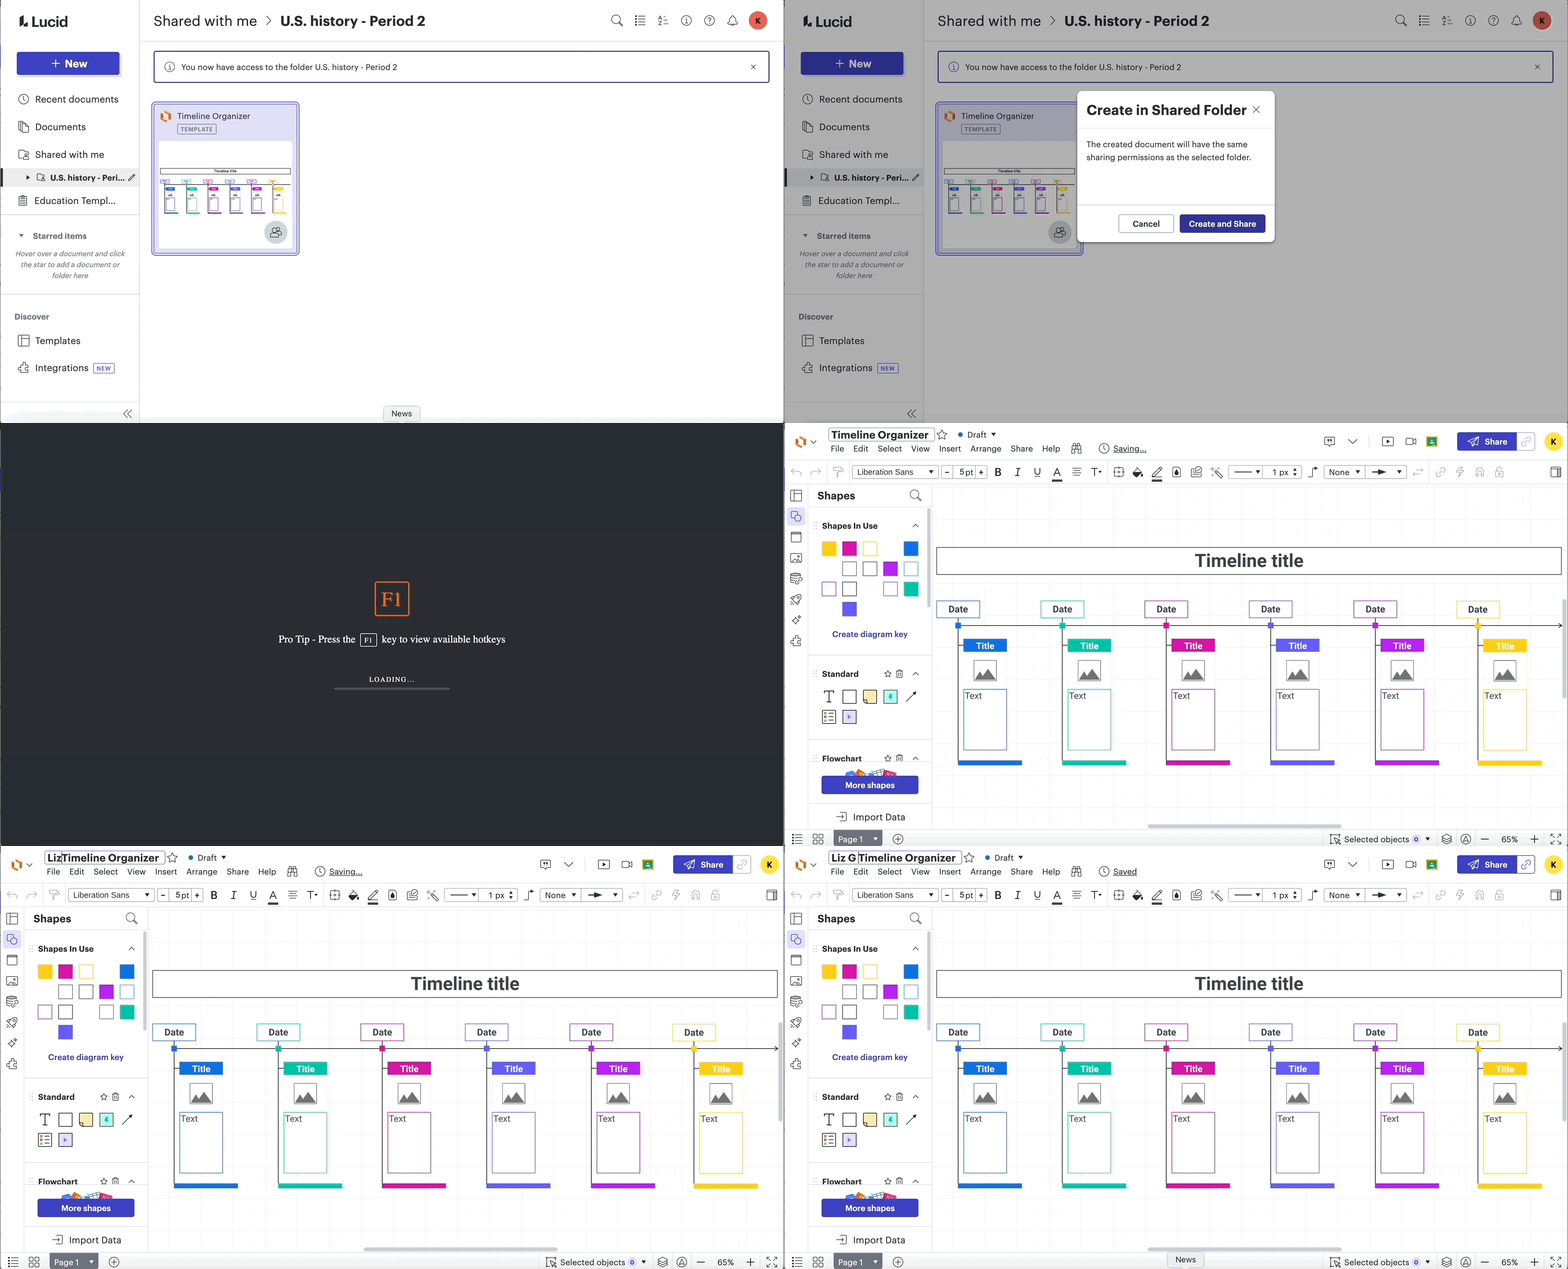
Once students access the folder and template, direct them to select "New" on the template to create a new document. The system will create the document within the folder, facilitating easy location and automatic sharing with everyone in the folder!
Note: To help with organization, instruct students to update their document title to include their name.

Let us know if you use this tip in your classroom and other ways you are utilizing templates or folders!


